Sourdough Challah (coconut & cardamom)

I made my first Challah last year around Easter. This mesmerizing braided bread was all over Instagram and I got to know about it more through my close IG baking family (Yes I have got more virtual friends than real friends now, hoping to meet them in the flesh one day). I made one as a trial and I was hooked. Then I moved onto the sourdough version.
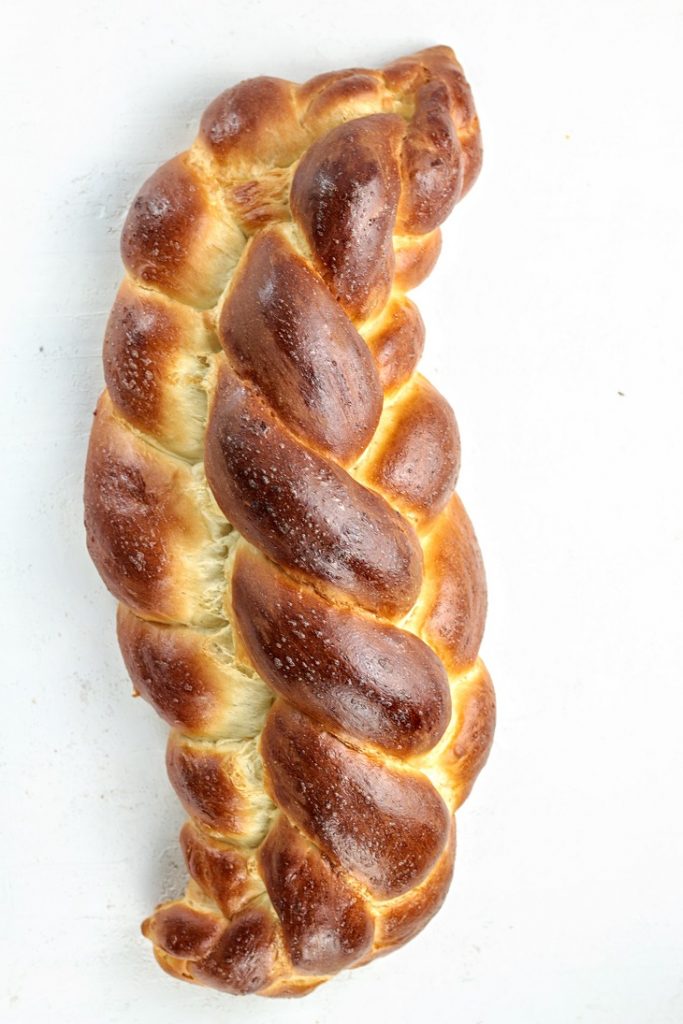
This bread is amazing, so many variations! You can create a masterpiece with it that fits any special occasion. I find it closer to a brioche but oil replacing all the butter. And I experimented with different flavors and textures, with milk, without milk and so far I liked all variations.
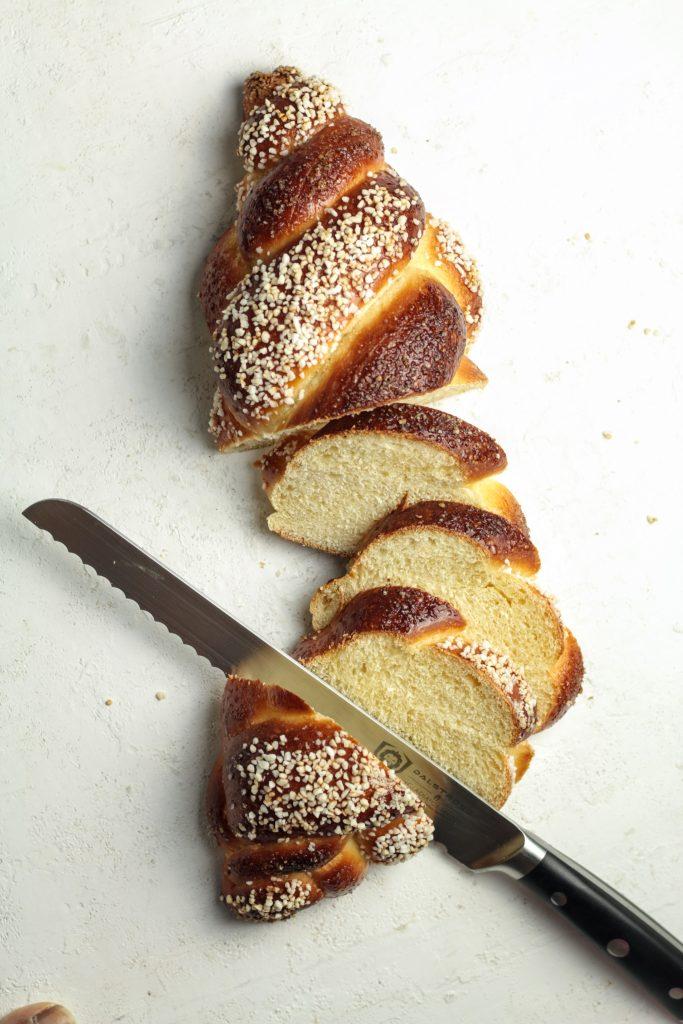
This version however uses coconut milk and cardamom, a spice that I love. But, I know not everyone is a fan of cardamom, so you can skip that completely and this bread will be just as delicious. If you like cardamom buns, then you will like this.
I tested this same challah with a sweet coconut filling in it. The recipe and the process is the same except that the strands are each stuffed with a nice coconut, maple syrup mixture. Check the bottom of the recipe/ post for the variation.
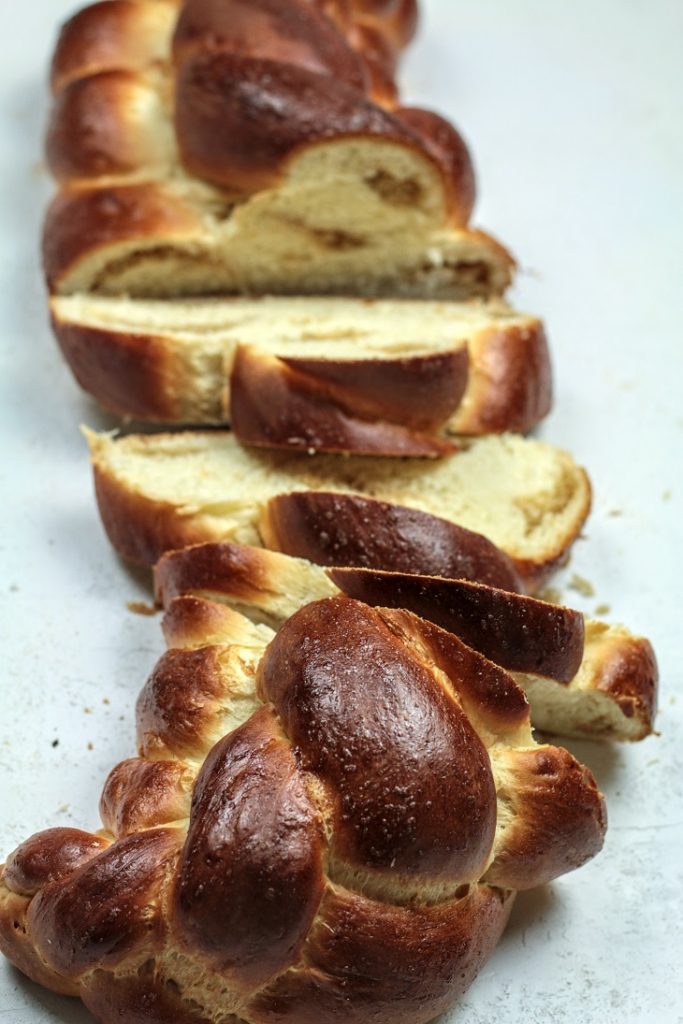
A stuffed coconut challah with "egg white" wash
Cardamom:
To get the maximum flavor, you need quality cardamom powder. If you have cardamom pods, even better. I always get the seeds out of the pods and grind them up using a mortar and pestle.
Oil:
I used canola oil. You can use vegetable oil too. If you wan to use coconut oil, use a little less as I find coconut oil makes the crumb bit denser. Also some coconut oils are very pungent, so be aware of that! I love the coconut smell and flavor of the oil, but some find it too overpowering.
Coconut milk:
I used canned, full-fat coconut milk, not coconut cream. If are lucky enough to find freshly squeezed coconut milk, then by all means use it! Some brands have more coconut flavor than others.
Sugar:
I used dark brown sugar. You can use white sugar or light brown sugar, the crumb will be of a lighter color, flavor wise you wouldn't notice a difference. Use coconut sugar as a wholesome option, this wouldn't affect the flavor much.
Flour:
All purpose flour is the best. It gives a softer crumb which we like in a bread like this. Usually eaten with butter or made into french toasts. You can use bread flour, but the texture will be different as bread flour has more gluten. The bread will be chewy and less soft.
Onto the steps:
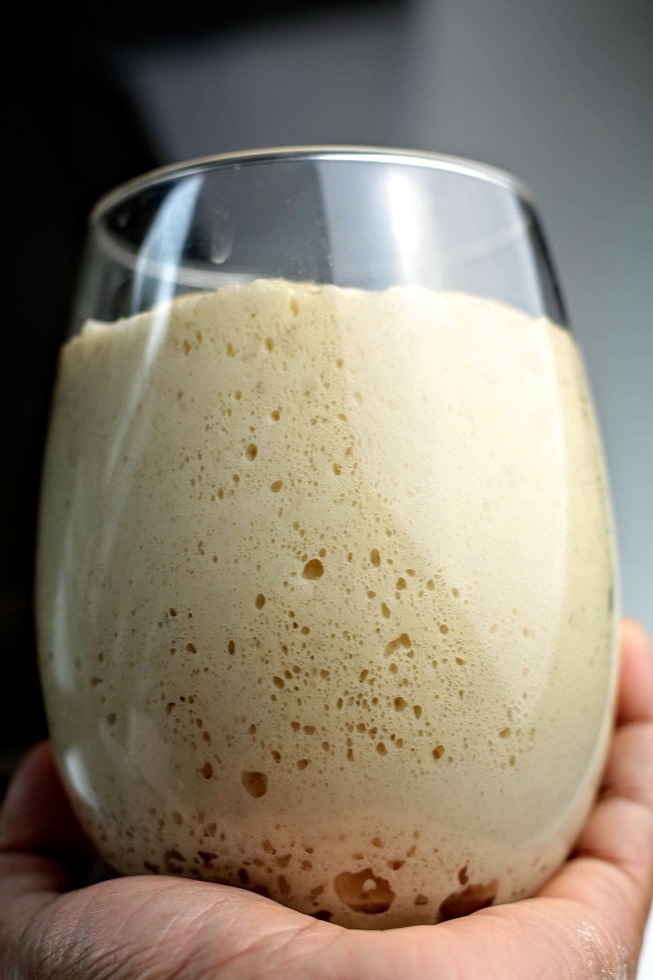
First up! get the stiff starter ready.
Use fed matured starter to make this stiff starter. Mix everything and knead into a nice smooth ball and place in a container and cover loosely. Leave on the counter overnight or about 8 - 10 hours. when it is spongy like this, you will know it's ready
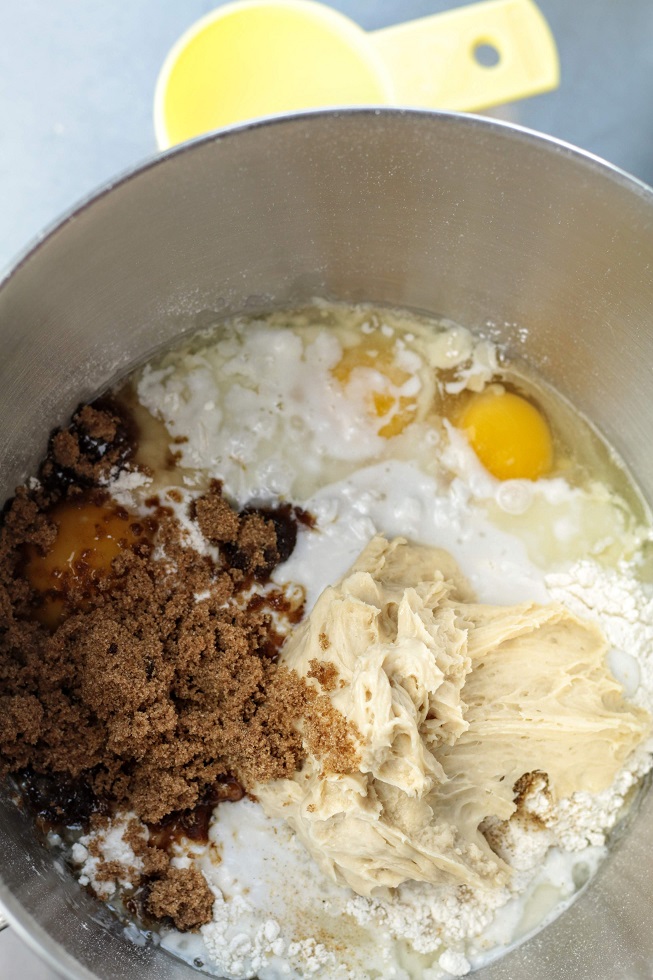
Weigh everything except for the water, into the mixing bowl. See my half cup of water is still on the bench ready to go. First mix everything on low speed, once they start to come together, gradually add water. Once everything is hydrated and the dough becomes sticky, stop adding water. If it feels too wet, just add a tablespoon of flour, nothing to worry!
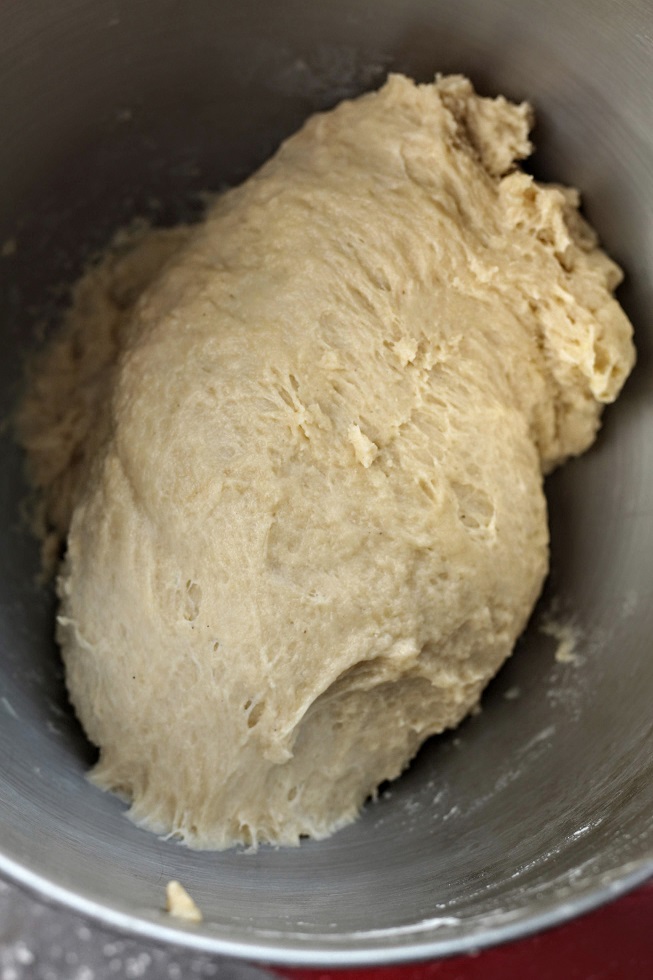
This is the sticky dough. As you can see, it is soft but most home mixers will not be able to handle it. So when it comes to this stage, take it out on to a floured surface and knead by hands. Use slap and fold to bring it together. A few folds and the dough will start to look smooth.
Do not over mix, it will go right back to sticky stage. If you accidentally did that, let the dough rest for 30 minutes and fold again and this time stop when it is just smooth.
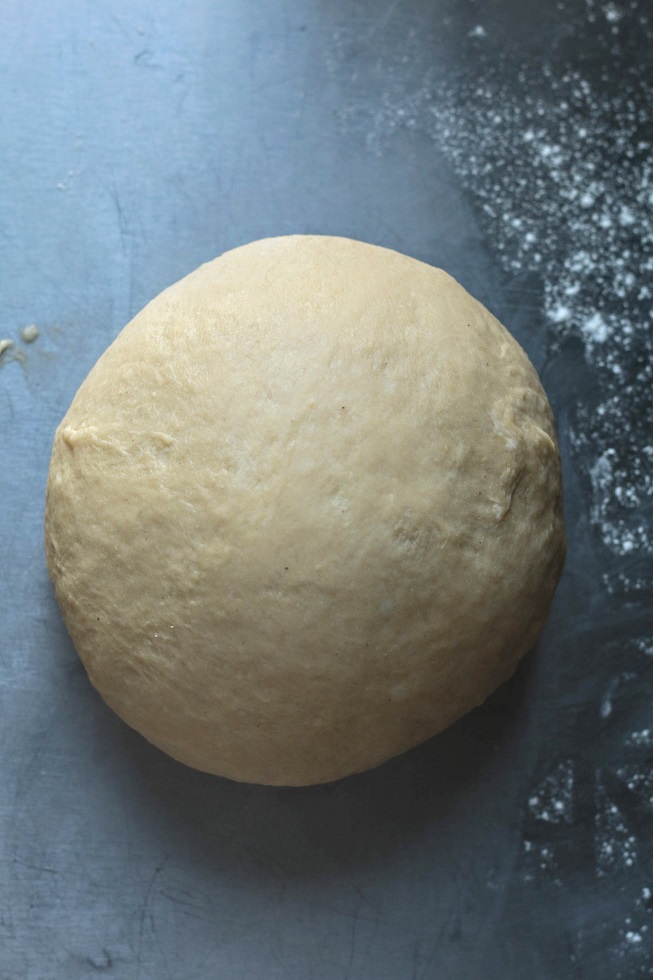
This is how smooth the dough will look like. It is soft but hold it's shape nicely. A little bit sticky but very manageable.
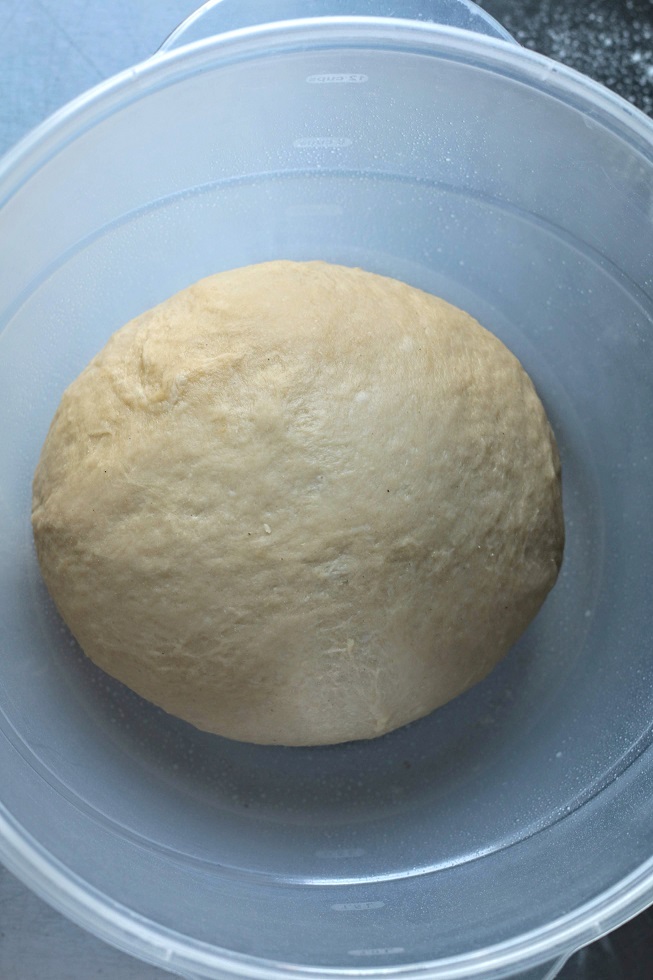
Place the smooth dough in a lightly greased bowl, cover and leave to bulk in a warm place.
It took about 4 hours in a 23C temperature.
Look at the next picture to see the bulked dough
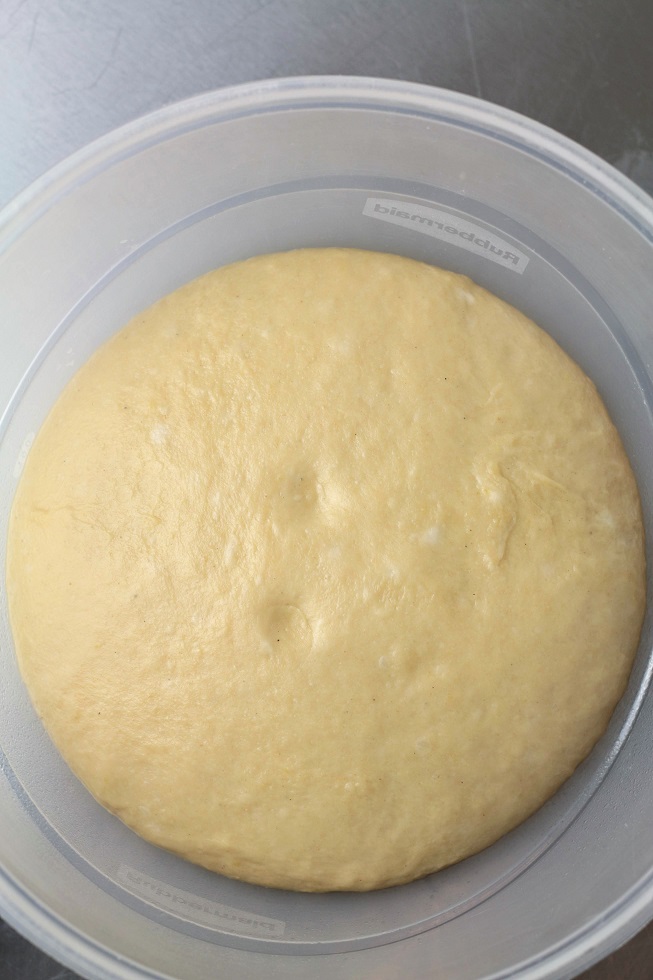
It has grown considerably. It has spread a bit and feels a lot more softer and spongy to the tough.
It doesn't have to be exactly doubled. Look for the above texture rather than volume.
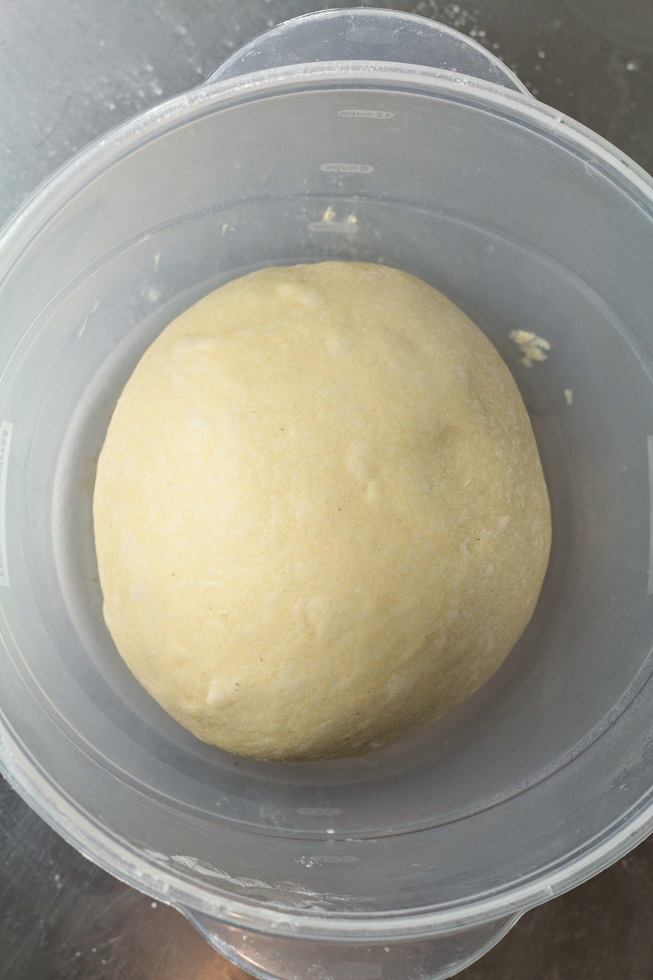
Punch down the dough and roll it into a smooth tight dough ball again. Place in the same container, close tightly and refrigerate for retardation. This can be anywhere from 12 to 24 hours.
You can always skip this process and move on to shaping, proofing and baking on the same day. Let the dough rest about 30 minutes in the fridge for better shaping.
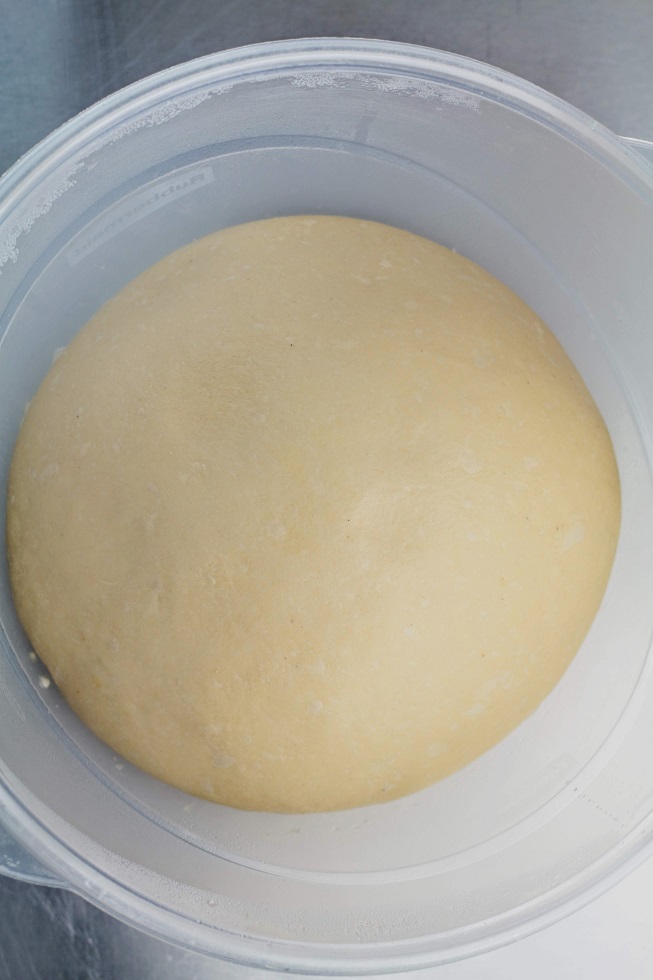
This is the dough straight out of fridge. It has definitely been slowly fermenting. This will be very stiff to touch, so let the dough sit at room temperature until it is soft, but still slightly cold.
Soft buttery (oily) doughs are easier to handle when cold
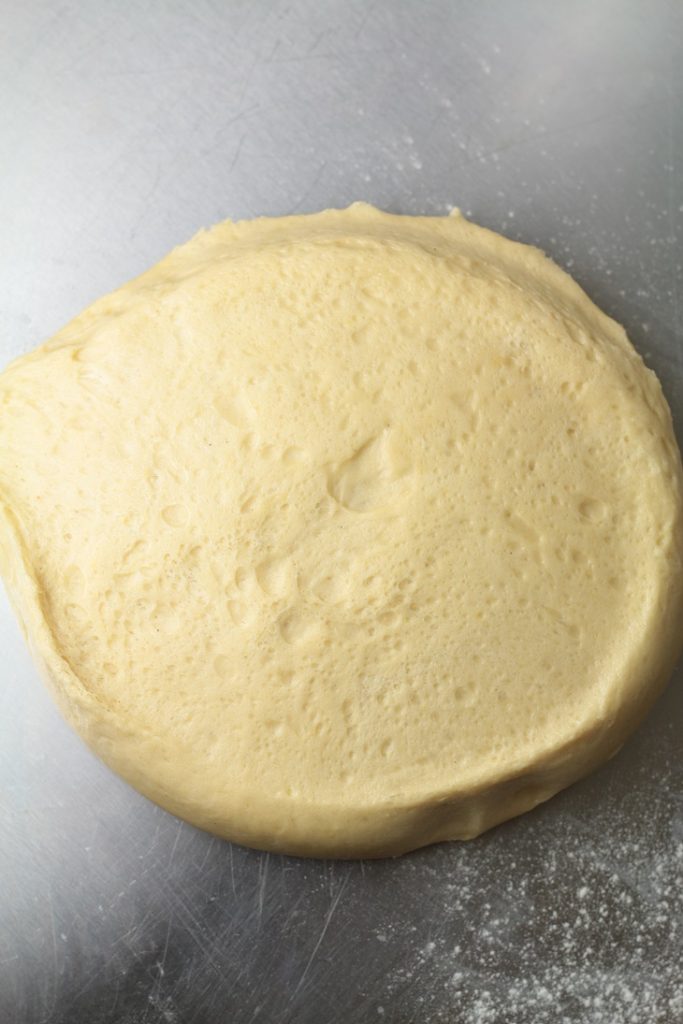
Tip the dough onto a floured surface. Notice the air bubbles and the spongy texture. This is a good sign. This means our starter is still active and going strong.
Divide this dough into any number of pieces you want.
You can decide how many strands you want for your Challah 2,3,4,5,6,7,8 etc
I'm going with 5
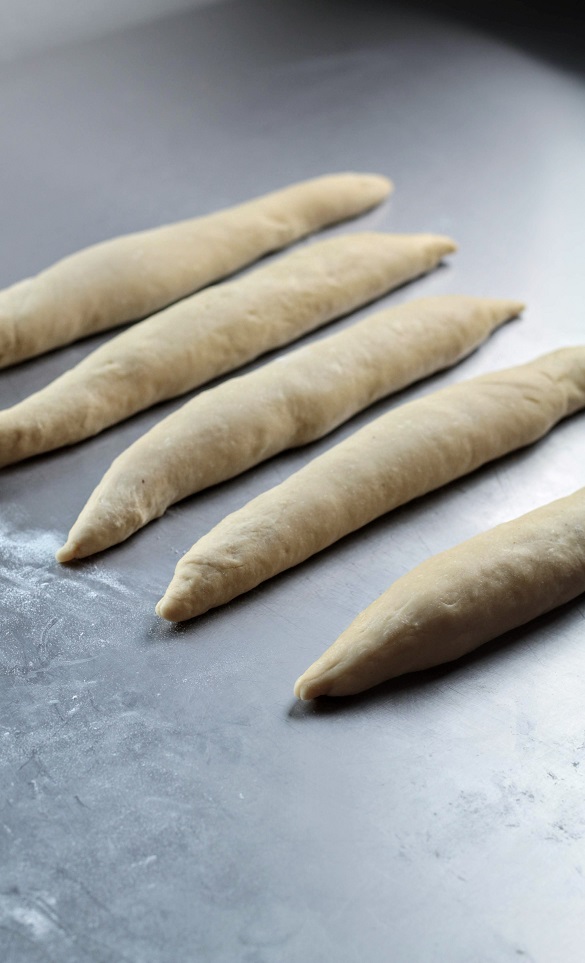
Check bottom for a slightly modified versionRoll each dough piece to a log as shown in the picture. Put pressure and roll out tightly. Try to get all the air out. Dough should feel solid, without any air trapped in it.
let them rest for 5 minutes and roll again stretching sideways to lengthen them. Get them as long as you prefer.
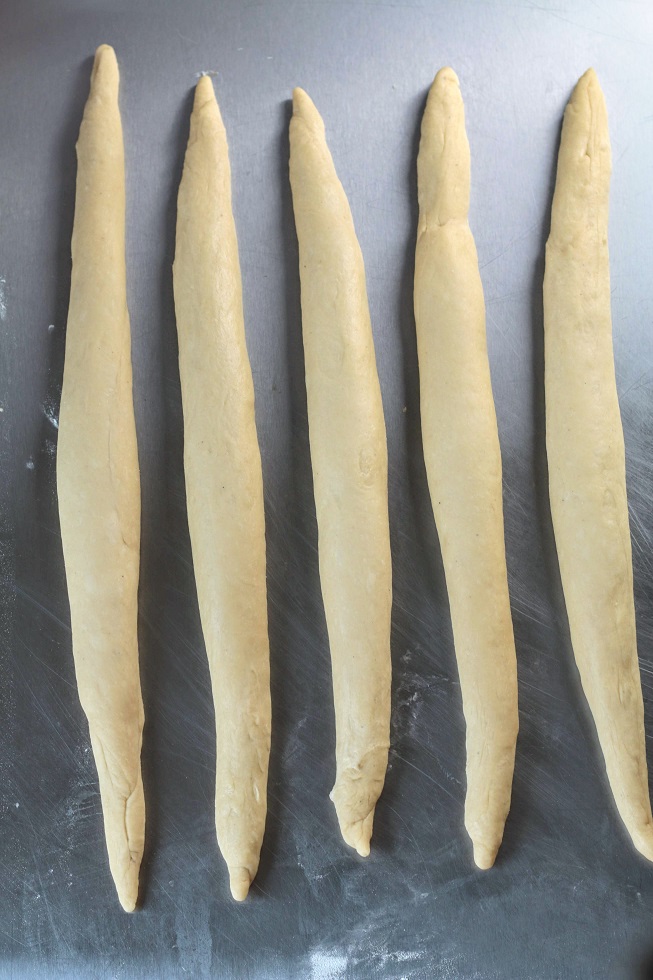
I stopped at this length. There is no right or wrong length, it's completely up to you. Go with whatever you are comfortable with.
They don't have to be this shape, yours can be all the same width all along.
I am aiming for a 3D braid, that's why I shaped my pieces like this.
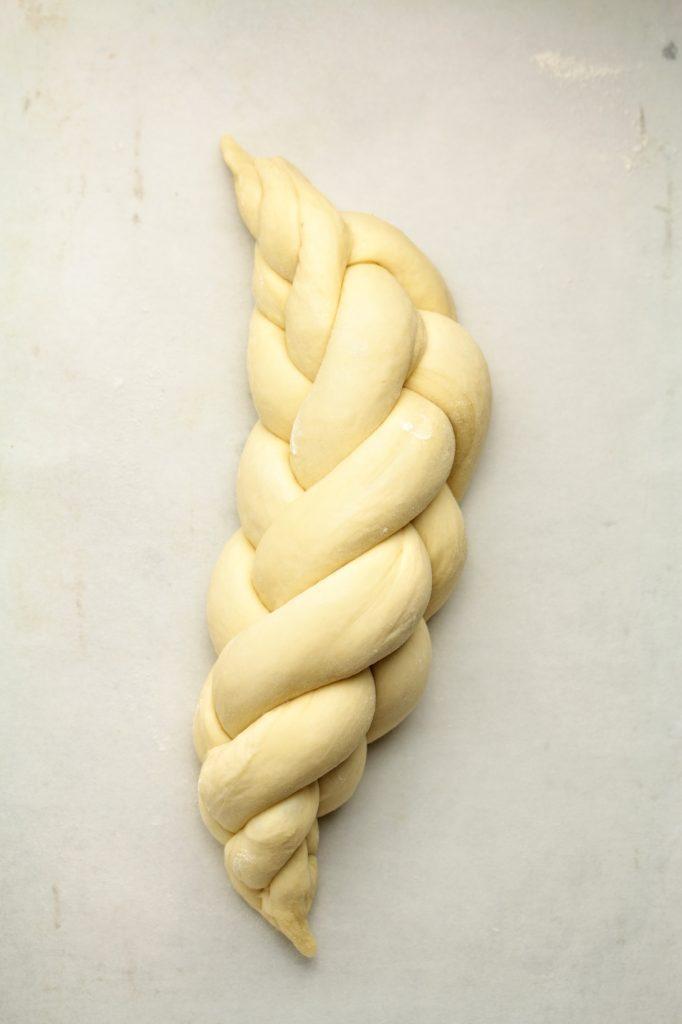
Do the braid to shape the challah. Check videos on the internet to see how to do it. I have a video on my IGTV or on youtube if you like to see.
Make sure to braid loosely. The dough will proof once more and also there will be oven spring.
Once done, place on a tray and proof for another 3-4 hours in a warm place until ready to bake
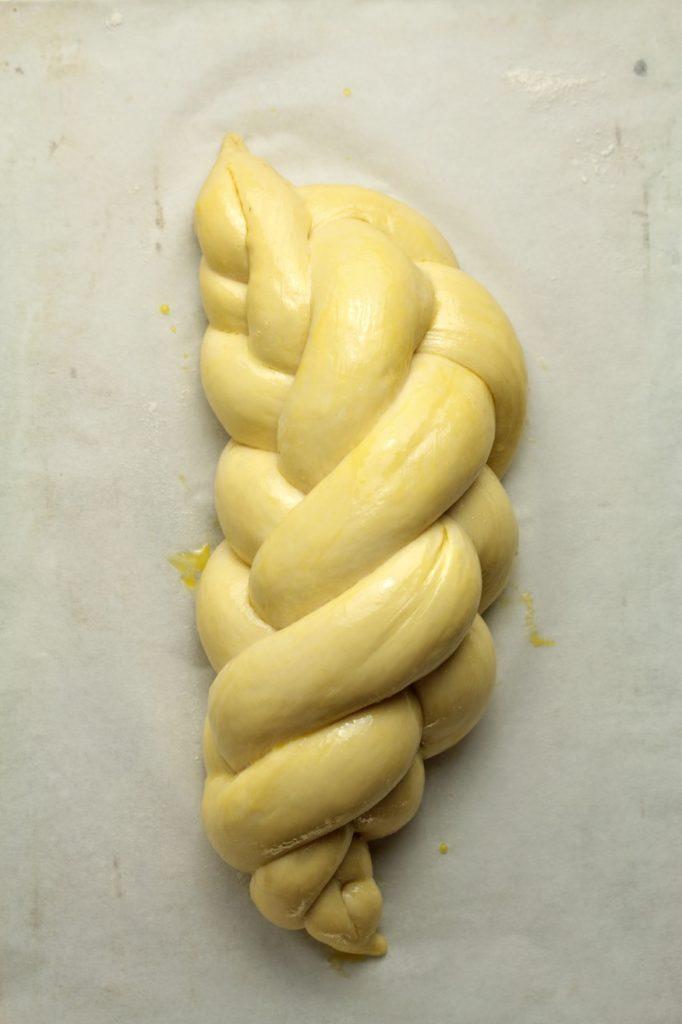
This is the proofed Challah. Do the poke test to see if it is proofed.
Preheat the oven to 375 F
Egg wash and bake for 30 to 40 minutes. Check at halfway mark. If top is browning quickly, cover top with foil, or reduce temperature slightly. Rotate the baking tray to bake evenly.
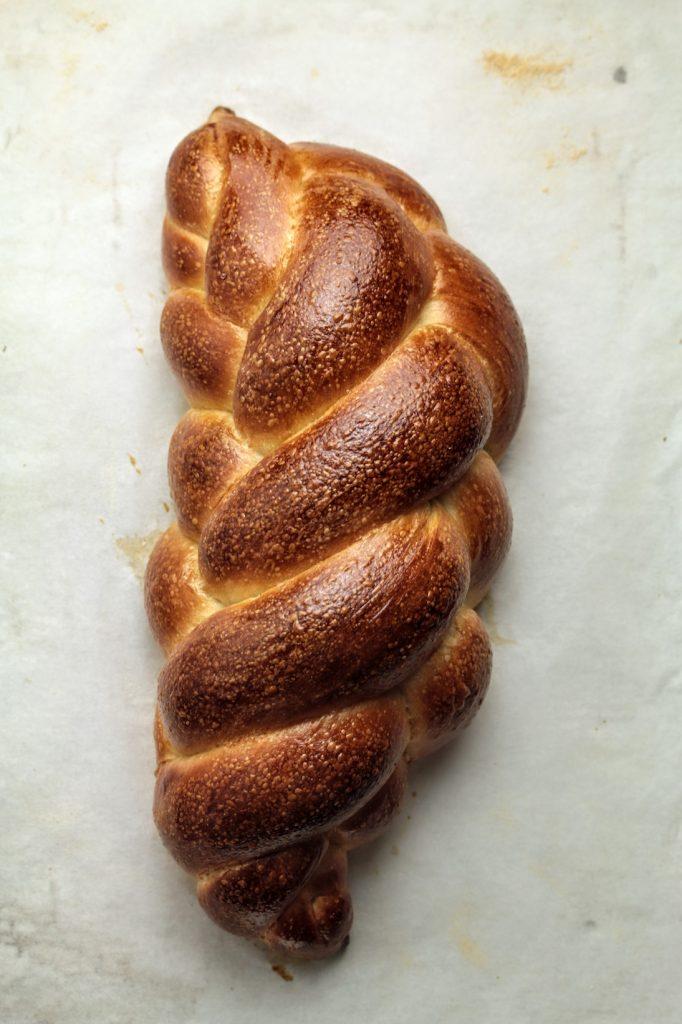
Once baked, you can brush with a light sugar syrup or leave it as is.
Let this cool on a wire rack.
A variation if you want to try:
Here I have stuffed each strand with a sweet coconut mixture. Make this mixture while the dough is bulking.
1 cup desiccated coconut (dehydrated) or fresh coconut
1/3 cup maple syrup ( "kithul treacle" if you can find)
2 tbsp brown sugar
1 tbsp castor sugar
1/2 tsp ground cardamom
pinch of salt
In a shallow saucepan bring maple syrup and sugars in to a boil and stir until sugar dissolve. Add the coconut, cardamom and salt and cook stirring on low heat until most of the moisture is evaporated ( should not be runny) let cool completely
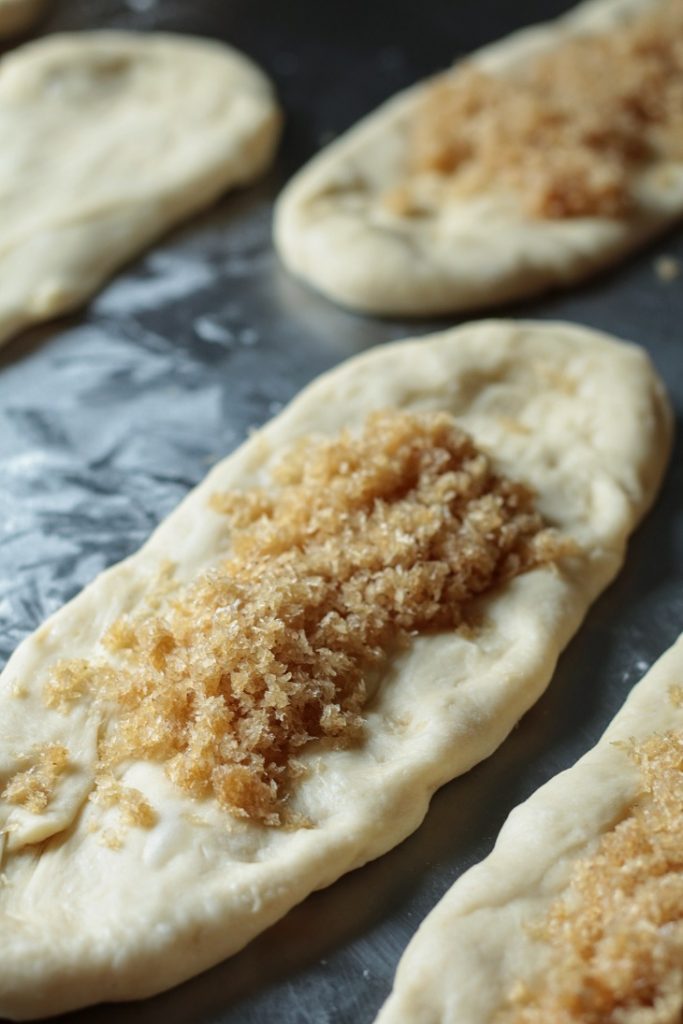
Flatten each dough piece and place some of the completely cooled coconut mixture in the center. See how fluffy the coconut mixture look. If you want it to look darker, use all brown sugar instead of white sugar.
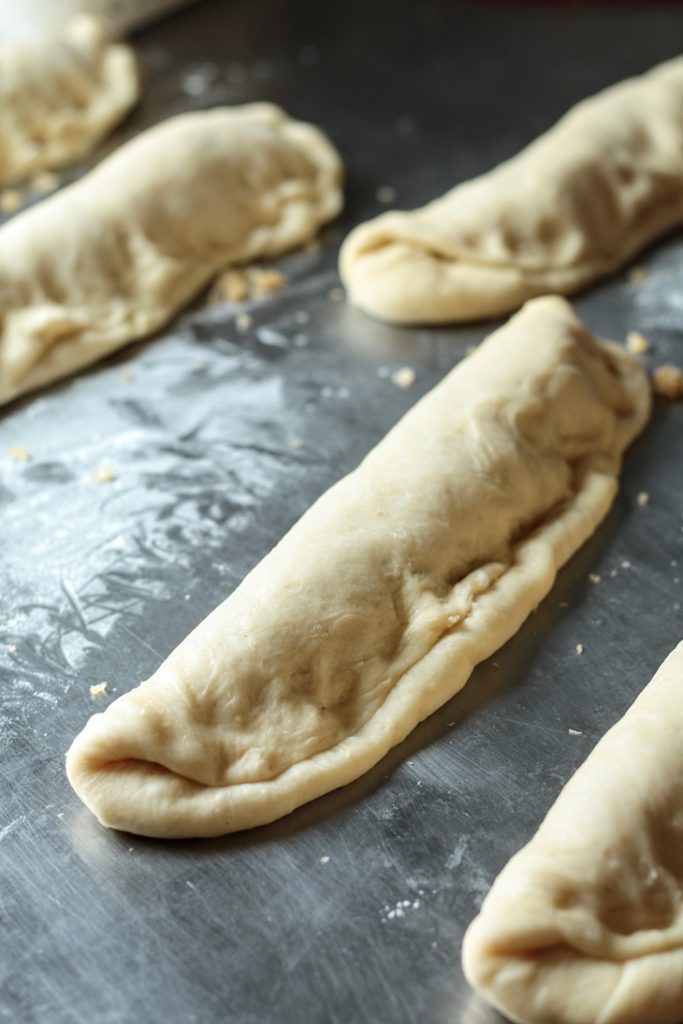
Seal the coconut mixture in by folding the dough like shown in the picture. Pinch the seem thoroughly to stop mixture coming out. Then roll the dough piece into a long log just like in the original recipe.
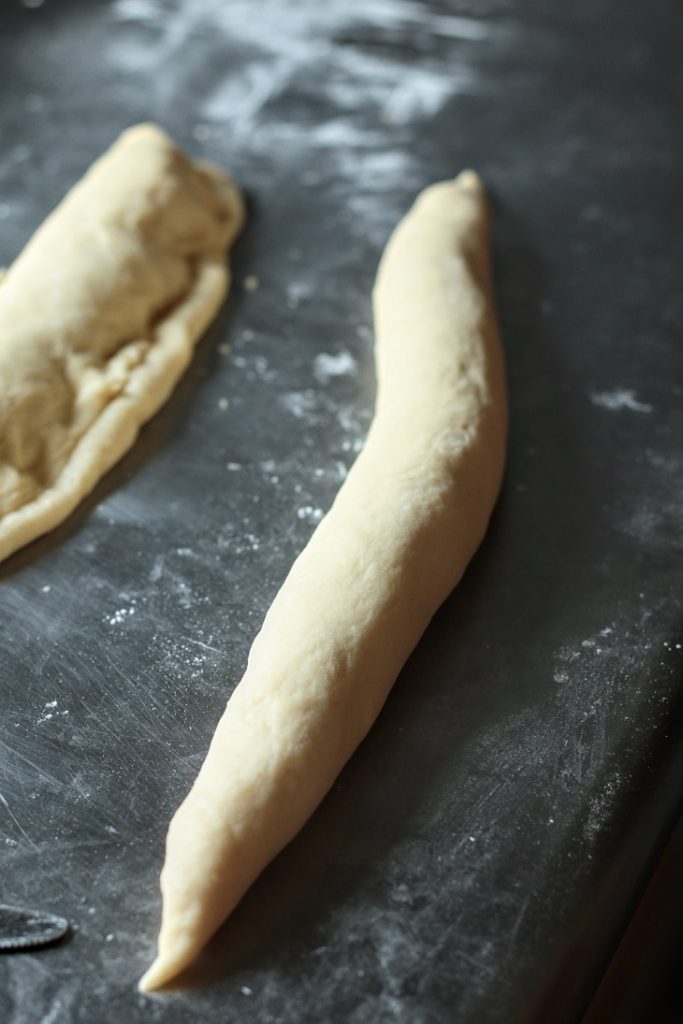
A dough rolled into a log, with filling inside. Continue with others similarly and now they are ready to be braided into any pattern you like.
Check my 5 strand braiding video here
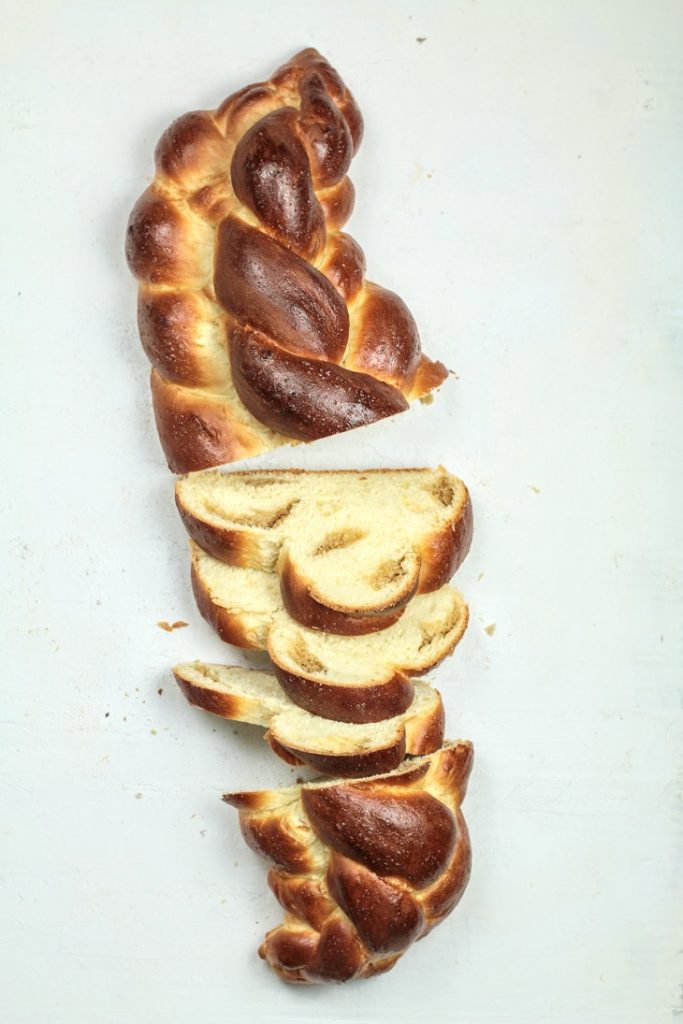
Sourdough Challah (coconut & cardamom)
Ingredients
Method
- 1
Make the starter 8-10 hours prior to making bread ( overnight will do)
- 2
To make the bread dough, mix everything except for the water and start to mix on low speed
- 3
Add water gradually and keep mixing until everything comes together into a soft sticky dough ball
- 4
Mix for a further minutes if your machine doesn't sound strained
- 5
Then take the dough out onto a floured surface, use slap and fold method to finish kneading the dough
- 6
The dough should be smooth and manageable at this stage, but slightly on the sticky side
- 7
Place the dough in a lightly greased container, cover and place in a warm environment for the bulk
- 8
This may take 3-4 hours. Check for the increase in volume and smooth sponge like texture (check pictures above)
- 9
Punch down the dough and roll back into a tight ball, place in a container, cover (make sure it's air tight) and place in the fridge for several hours ( 12 - 24)
- 10
I usually leave it for 16 hours
- 11
Take the dough out of the fridge and leave at room temperature to soften up
- 12
Divide the dough into several equal pieces. You can decide how many strands you want for your Challah
- 13
Roll out the dough pieces into long strands. Make sure they are tightly molded and no air bubbles are trapped in the dough.
- 14
It will be difficult to roll out to the required length in one go. Leave the strands to rest for 5 minutes and then roll out again to the desired length
- 15
There is no specific length, this depends on how long you want you challah to be ( or the length of the tray)
- 16
Once you get the strands, do the braiding you prefer
- 17
Make sure the ends are nicely tucked in or pinched tightly
- 18
Place this on a tray lined with parchment and leave to proof
- 19
You can cover this loosely with plastic to stop from drying
- 20
It might take about 3 hours to proof, do the poke test to make sure
- 21
When challah is almost proofed, preheat the oven to 375 F
- 22
Egg wash the challah lightly. Use egg white + sugar for a dark brown(mahogany) shade with shine, use egg yolk for a golden (yellowish) color
- 23
Bake for 30 - 40 minutes.
- 24
Always keep an eye. Check at 20 minutes mark to see if it is browning too quickly. If so, cover the top with foil. You can also rotate the pan for an even bake.
- 25
Once it is almost evenly golden brown, take it out of the oven and place the tray on a wire rack to cool
- 26
You can brush this with a sugar syrup (mix one part sugar to one part water and boil for a minute) if you like or leave it as is
- 27
Once cool enough to handle, lift it off the tray and place on a wire rack
Never Miss a Recipe
Get new recipes straight to your inbox.


Comments
Loading comments…