Hearty Sourdough Rye Sandwich Loaf

Why bother creating another Rye bread recipe? If you thought that, then here is why I went and created my very own version of a Rye Sandwich loaf. Firstly, Rye is one of my favorite flours to mix into bread, in fact my very first sourdough ( about 6 years ago) was a no-knead Rye country loaf. Even before that, when I was still living in Sri Lanka, I had the pleasure of getting to know Rye (bread) during a work trip to Sweden. The hearty, dense, earthy and nutty bread served at "Fika" and breakfast was absolutely delicious. I had to wait until I migrated to Australia, to finally get my hands on some Rye and make some bread with it! When I wasn't making my bread, I used to buy a "Dark Rye Sandwich Loaf" from the supermarket and I loved it. But upon reading the ingredients I realized only 10% is actual Rye flour. So where did the color come from? From the Barley malt! That explains why the bread is super soft ( almost like a white). But this was a bit disappointing and so I decided to make a sandwich bread with at least 30% (probably a bit more) Rye in it and without other enriching ingredients like milk, butter, refined sugar or eggs.
A bit about Rye:
Rye is a grass that is closely related to wheat and barley. Rye is high in fiber, copper, magnesium, and several other essential nutrients. Rye flour is higher in gliadin but low in glutenin, the two proteins that bind together to form "gluten". Hence, even though the flour is not considerably lower in total protein content, it is significantly lower in gluten which is the protein responsible for strengthening a dough. Due to this reason, bread made with 100% Rye tend to be denser with a close crumb. But nonetheless, the bread tastes very good and is super nutritious. So if you wan to make much softer bread with a fairly open crumb, you will have to mix regular bread flour ( white wheat flour) with Rye.
Rye is not only for bread, you can use it in cookies, biscuits, pancakes and in pretty much anything that you make with flour. The % of Rye you use in a recipe will affect the texture,color and taste in the end product. A good one to experiment with.
Apart from baked goodies, Rye is also used in making alcohol. A part of the wheat/barley is replaced with Rye to give the beer or the whiskey a spicy, nutty tone.
The whole grain Gazelle Rye I am using today for this recipe is a spring verity, meaning it is planted in the spring and then harvested in the summer and fall.
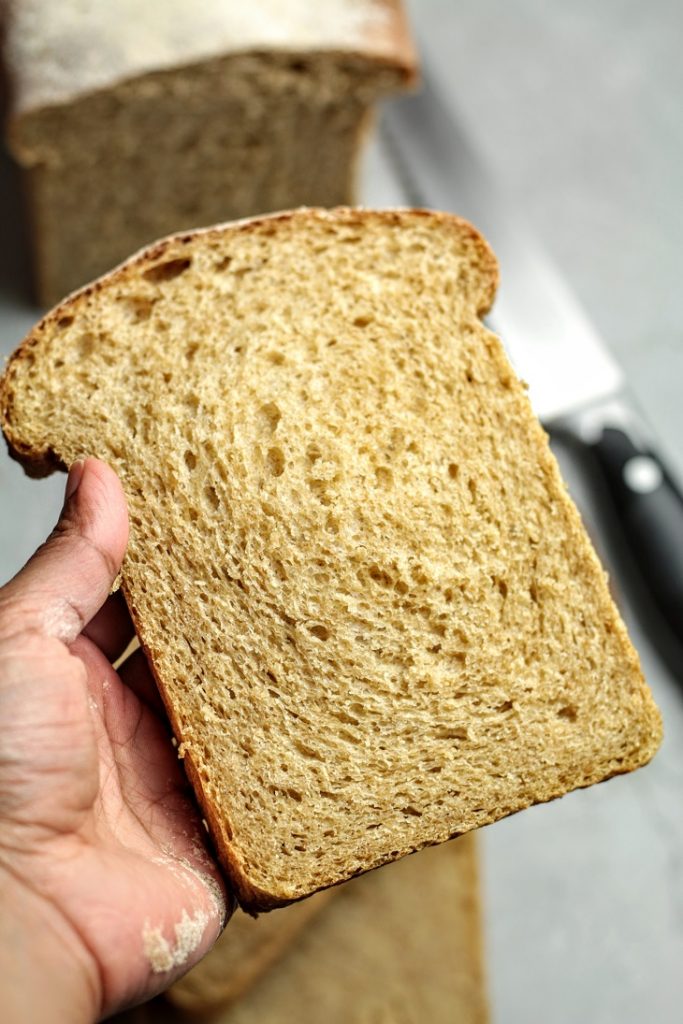
From the description above, you would have guessed by now, that it is going to be challenging to get an open, soft crumb with a higher % of Rye. Due to this, I decided to keep my Rye % at about 30-40. Also to get a moist crumb, I decided to use a roux. This eliminates the need to add milk or eggs. I am also using a bit of canola oil to give my crumb moisture and to prevent the crumb from drying out, in other words, to prolong the shelf life. Also a bit of molasses used in this bread, gives color, balances the sourness and also help speed up yeast activity. Rye flours have a much higher content of starch-degrading enzymes and due to this, you may notice that Rye bread bulk and proof faster given the perfect conditions.
I decided to use all-purpose flour for this bread, even though, bread flour would have been the ideal. All purpose flour is widely and readily available to many unlike bread flour. I realized, most consumer brands of bread flour, doesn't have the gluten % stated in the packaging. So this leaves many home bakers guessing or lost as how to go about using it in a recipe. So if this recipe worked with all purpose flour, then I can safely say store bought regular bread flour will work perfectly or even better.
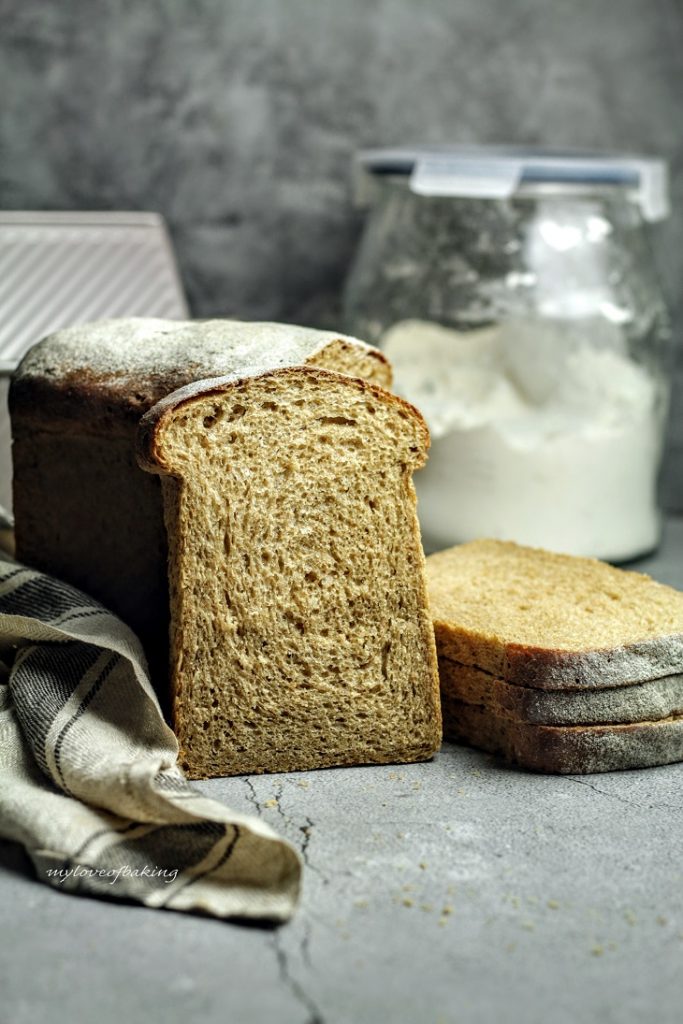
As always be mindful when adding water if you are not sure about the flour you are using or new to baking with the flour type.
If your roux is runny, you might need less water and if your roux is very thick (you may have cooked a little longer which is fine) you might need extra water for the dough
After three attempts, I settled for the following recipe and process. This bread is made and baked on the same day, so no overnight retardation/ slow fermenting. This help reduce sour flavor, that most of you don't like in a sandwich bread.
Note that you can always tweak the recipe to get the results you want, but always give the original recipe a go and make notes as to what needs to be changed.
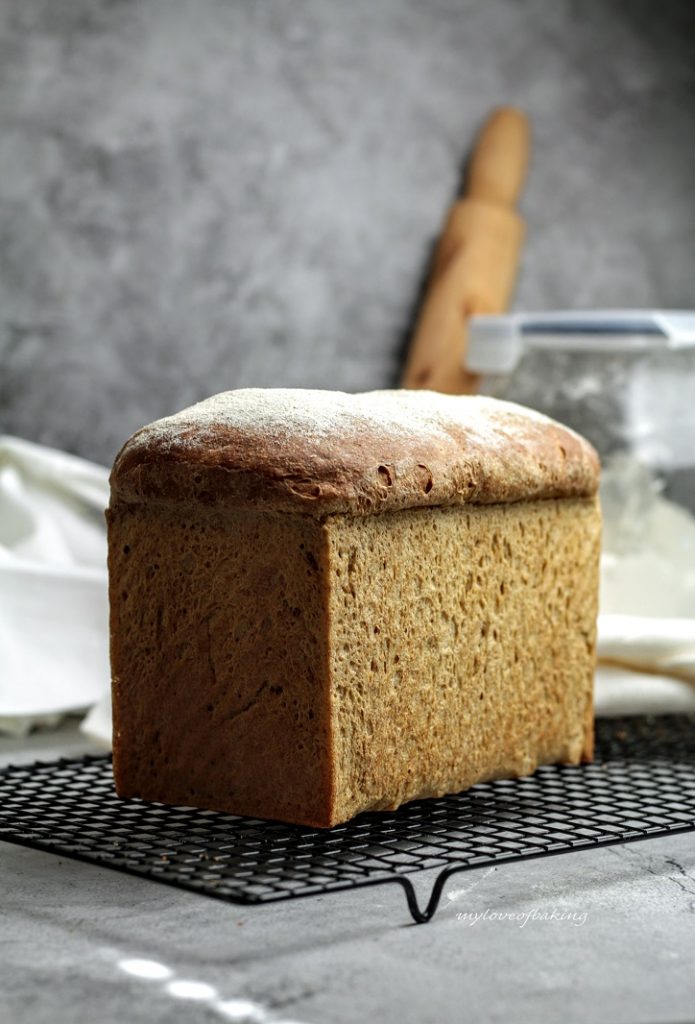
If you have a different bread pan, you can always adjust the recipe to get a bigger or smaller dough.
eg: increase it by 1.5 times for a bigger pan or .75 times for a 9 by 5 pan. This will need a couple of trials though.
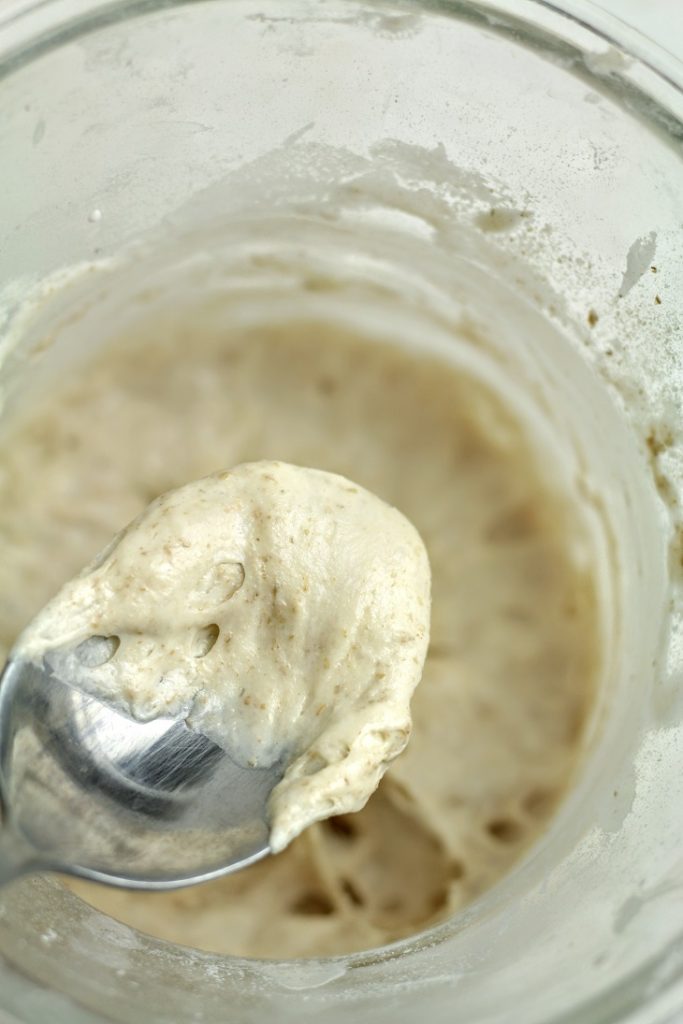
Get the starter ready. Refresh your starter and feed it accordingly. I have used a combination of Rye and all-purpose to feed my starter. It is optional to add Rye in the starter, but since you already have the flour, doesn't hurt to use it!
Adding a bit of Rye in the stater, would help activate it faster. So if you have a slow starter, this would benefit greatly. Also, do this if your kitchen temperature is very low
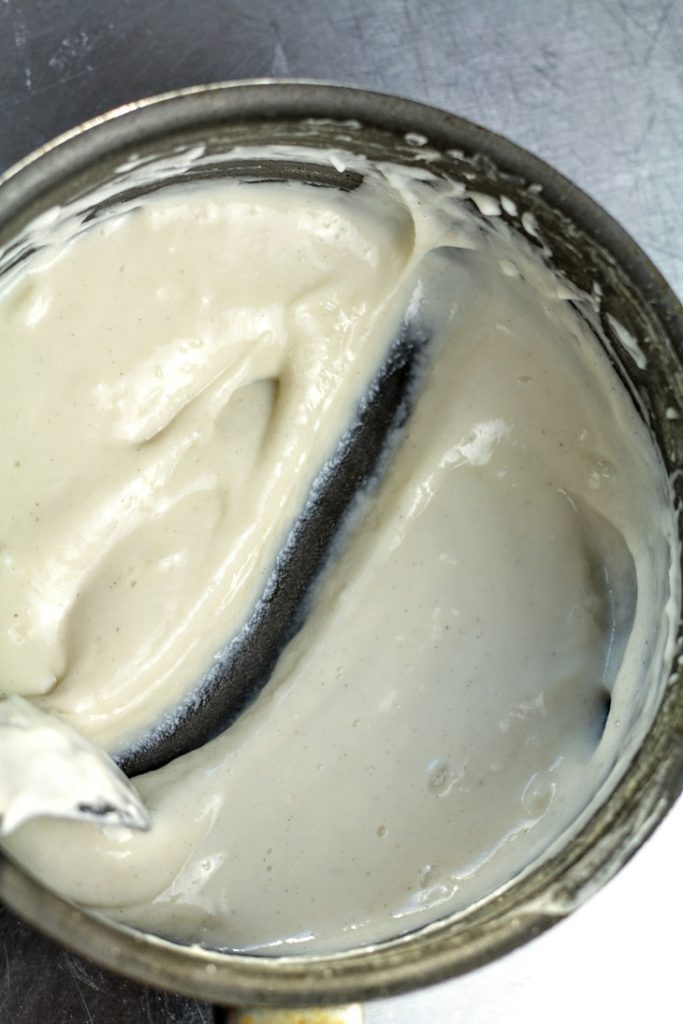
Make the roux by mixing 1/2 cup (65 g)flour ( all purpose) and 1 cup water (230 g) in a saucepan and cooking it string on medium low heat for about 5 minutes until it thickens. Leave this to cool completely.
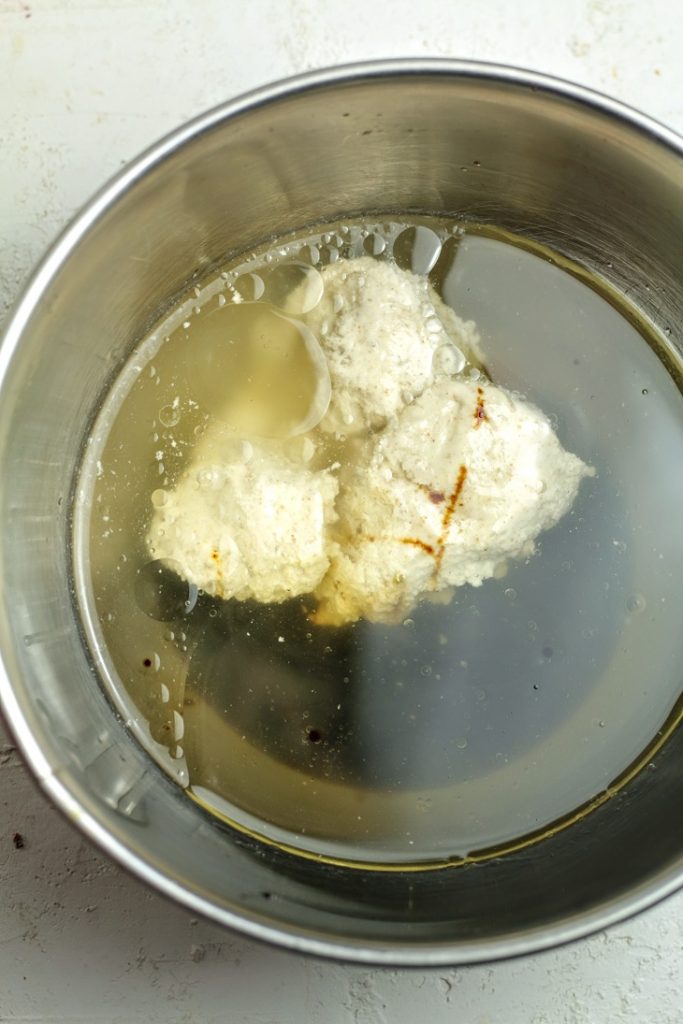
Weigh the water ( about 80% of the total water and always leave some aside) into a bowl. Add the stater, molasses, oil and give a good mix, before adding this into the flour mixture.
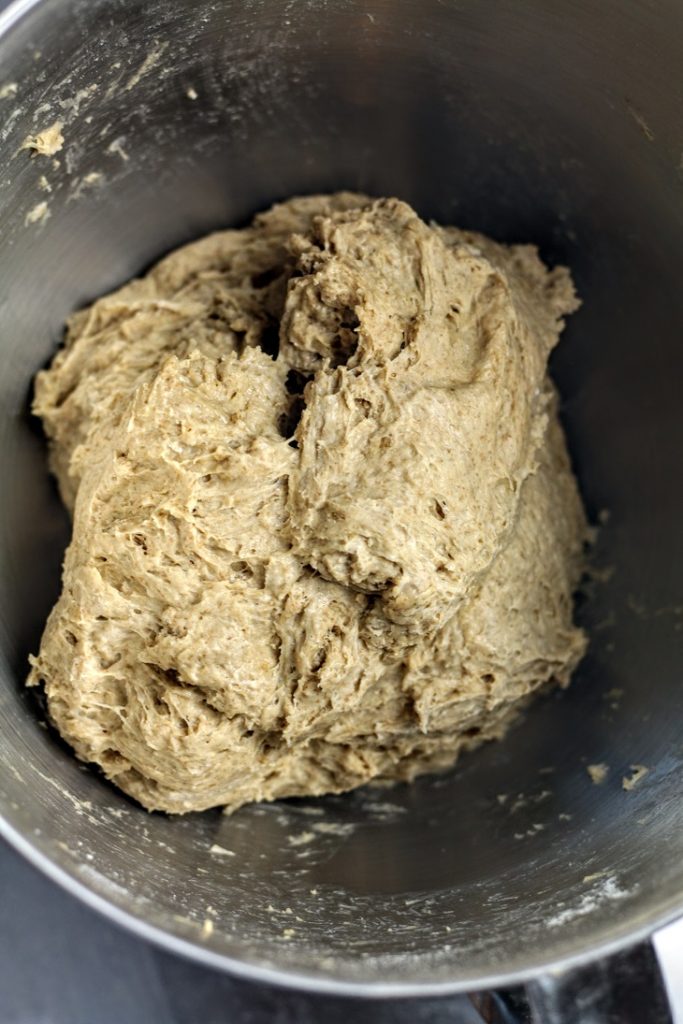
Using a stand mixer ( or by hand using a spatula) Blend flour, salt, the above liquid and the roux. Add the remaining water gradually until a sticky soft dough is formed.
Make sure all the flour is hydrated. Now cover this and leave to rest for about 15 - 30 minutes
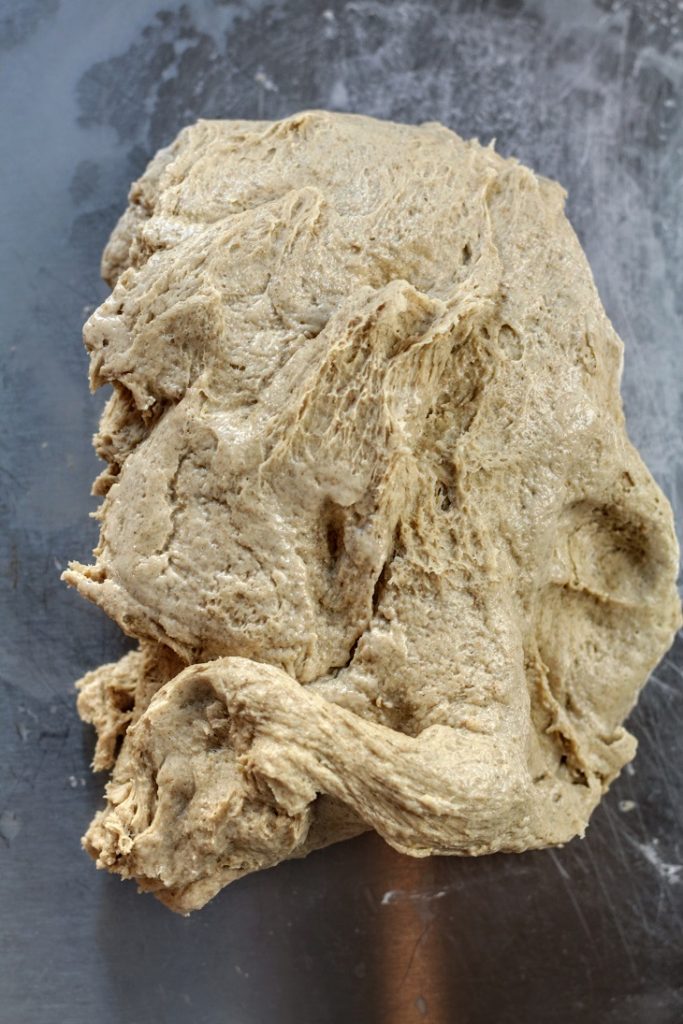
After the rest, mix the dough on medium speed (using the dough hook) until a semi-developed dough is formed. You'll have to scrape the bowl and hook several times. This will take about 2-3 minutes.
When the dough looks like in the picture, bring it onto a table.
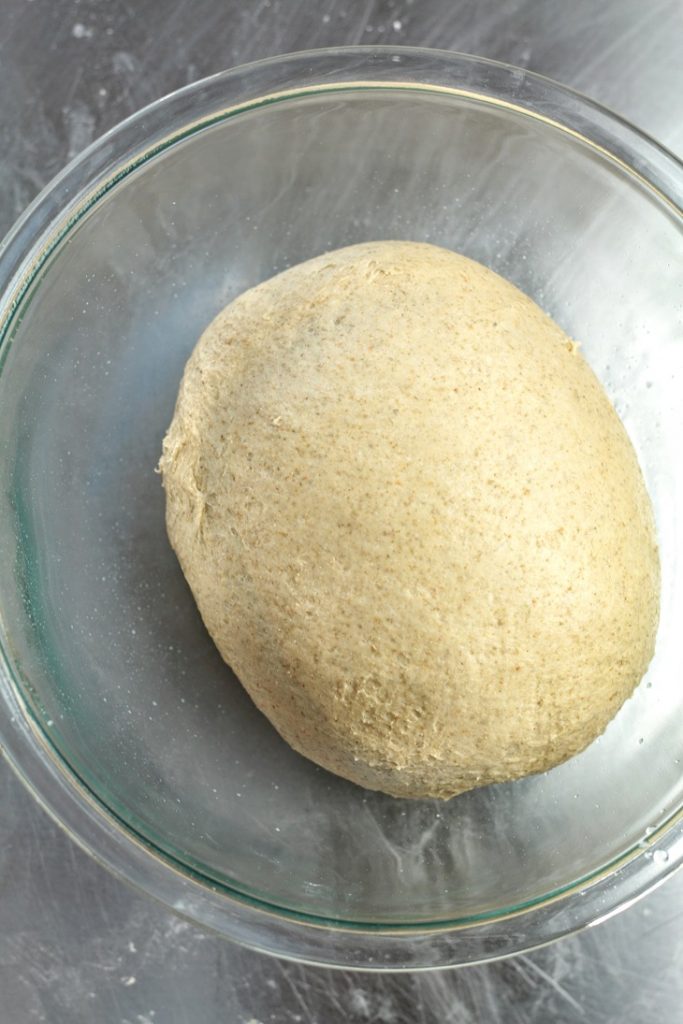
Knead the dough using slap and fold motion. Use water to lubricate your palms. As you knead for about 2-3 minutes, the dough will become stronger and less sticky.
This won't pass the "window test" so don't worry about checking. What you want is a firmer smoother dough that holds it's shape. place this in a lightly greased glass/plastic bowl, cover and leave in a warm place to bulk.
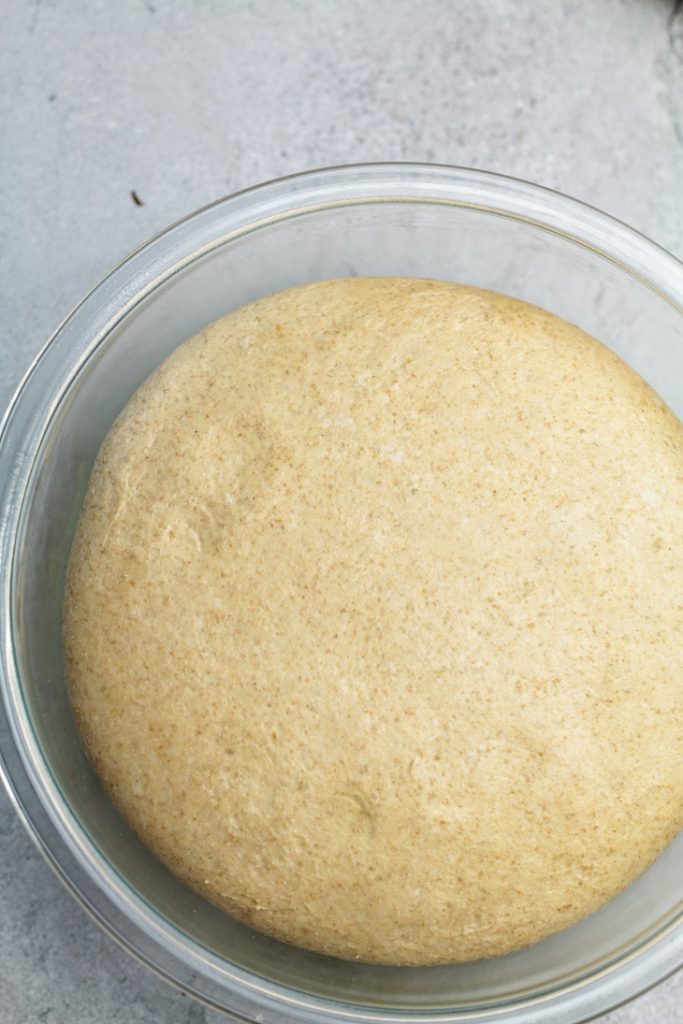
After 3 hours in a warm place (26 - 28 °C) the should be doubled in size. If your room temperature is low, this might take longer.
Try placing in a oven with a bowl of teaming hot water. Make sure the oven light is off, as it is way too warm. Speeding up bulk will help reducing the sour flavor.
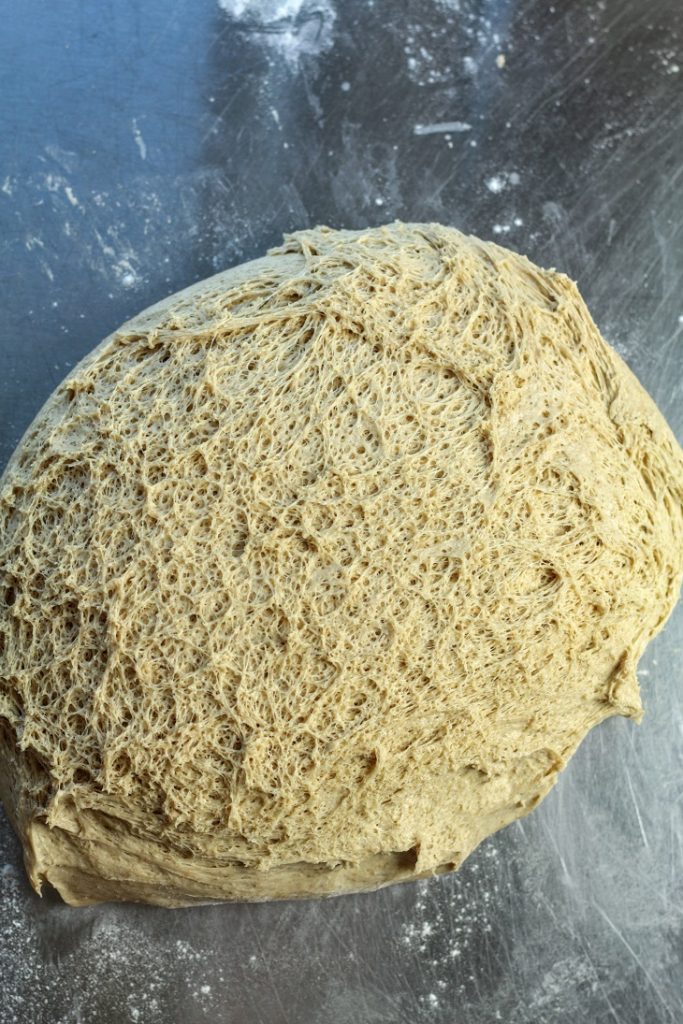
Tip the bulked dough on to a lightly dusted surface. Notice the sponge like texture and the gluten webbing.
Dust your hands with flour and pre-shape the dough in to a tight ball
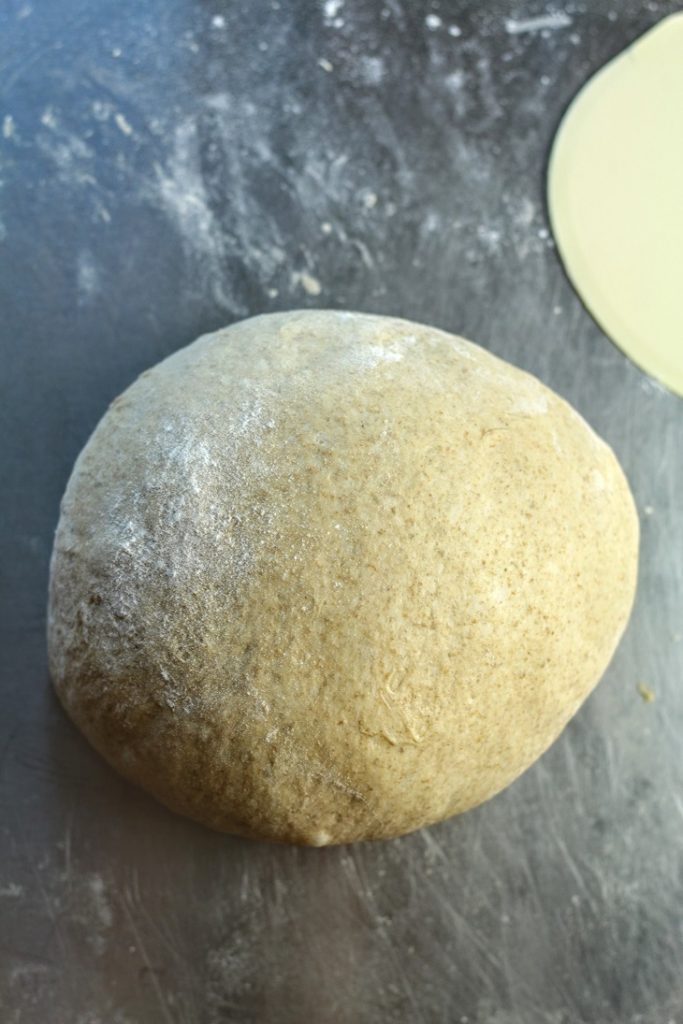
The pre-shaped dough need to be rested for about 30 minutes. You can cover and leave it on the counter or place it in the fridge if it is too warm outside.
If you like, you can retard this dough too. Simply place the dough in a air tight container and leave in the fridge and continue the next day. This will give time for flavor to develop.
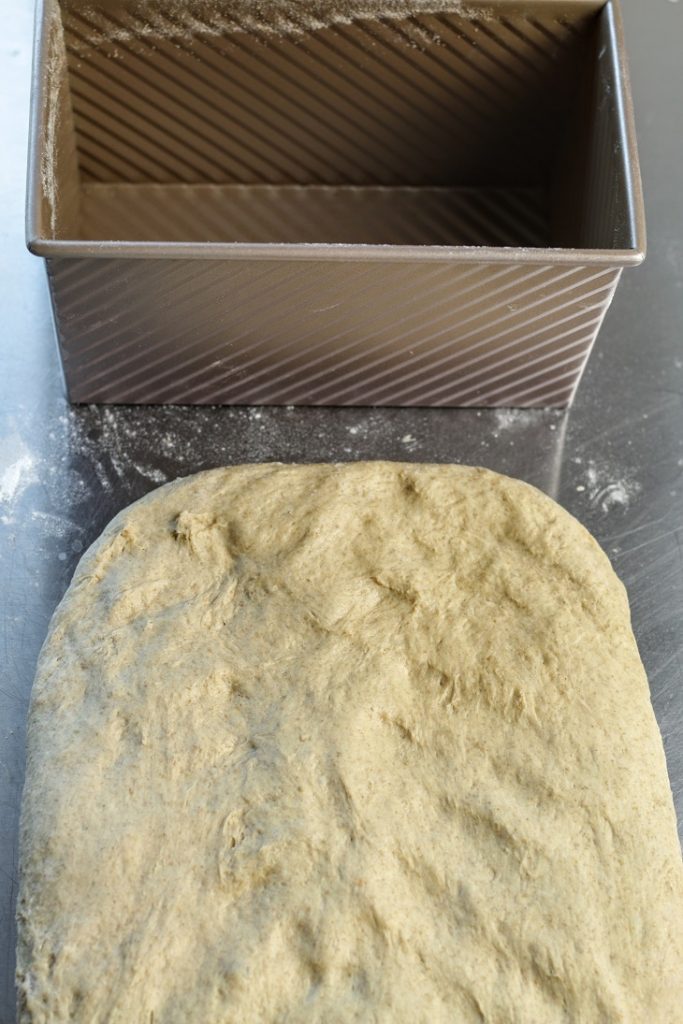
Shape the dough as you would normally do your pullman or pan loaves.
Always maintain the width, use the pan as a guide. Flatten the dough to a rectangular shape ( about 1/2 inch thickness, roughly). The thickness and the length could vary.
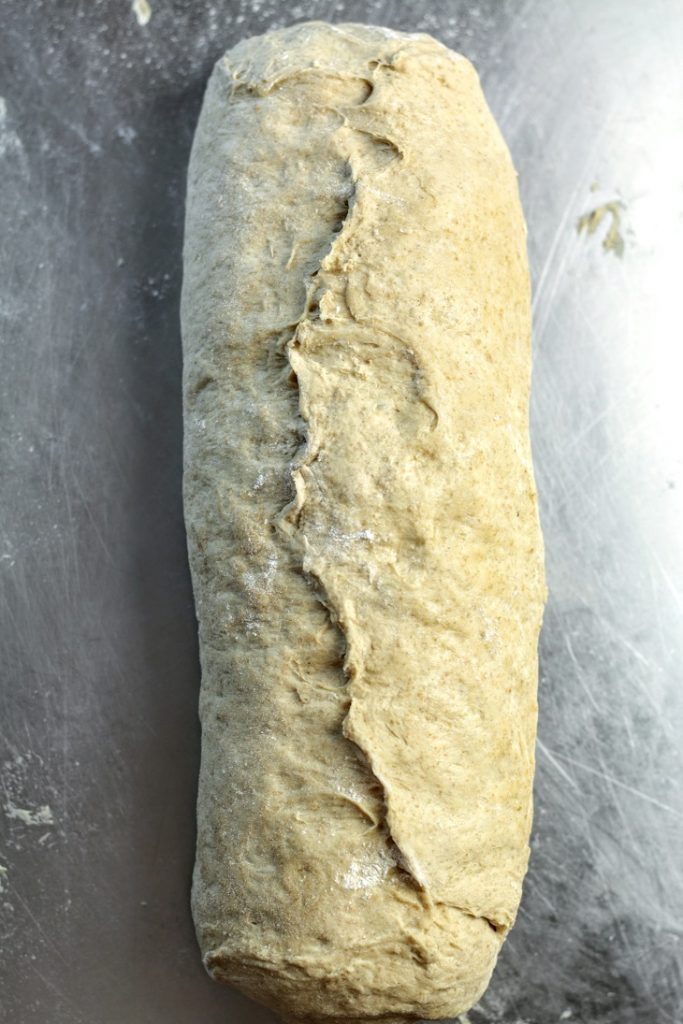
Start rolling from one side (shorter side) along the length and pinch the seem.
This recipe is developed to fit the following tin dimensions:
8.4(L) x 4.8(W) x 4.5(H) inch without the lid
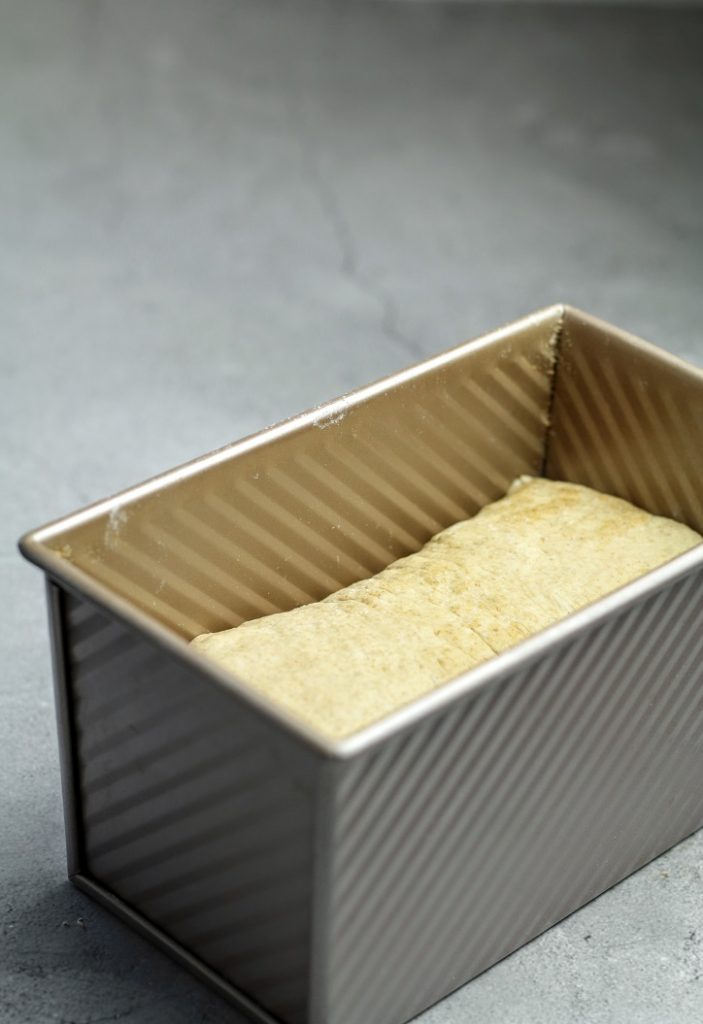
Place the dough in the pan seem side facing down. Cover loosely with a plastic bag and place in a warm place to proof.
should take about 3 - 3.5 hours in 26 - 28 °C
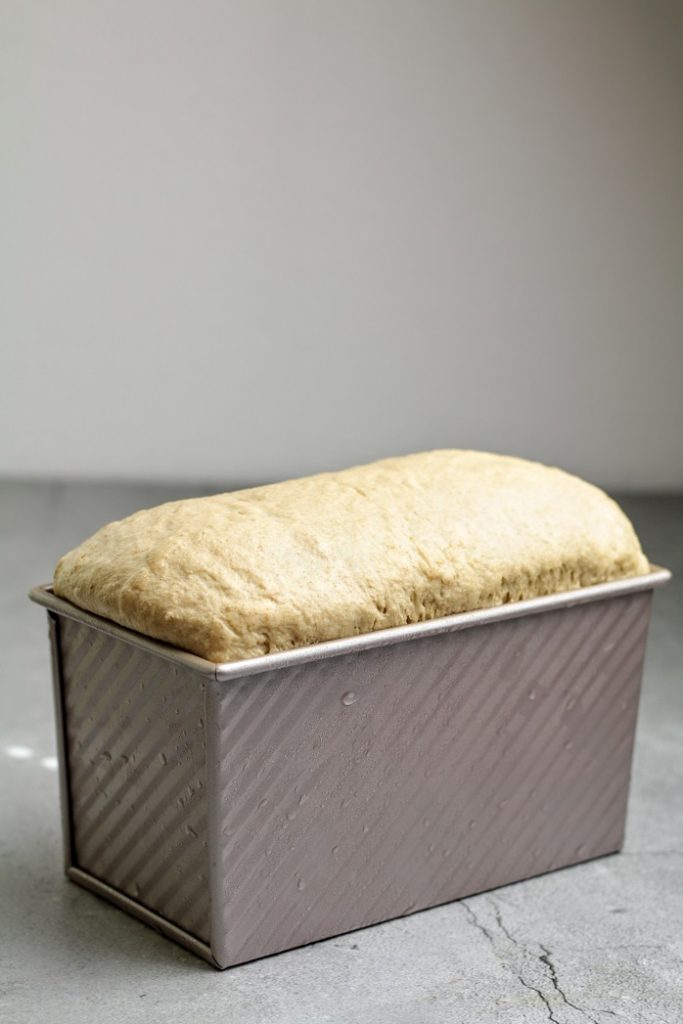
The loaf should proof about an inch off the rim. Remember, we are not using the lid for this bread.
When the dough reaches the top, get the oven ready.
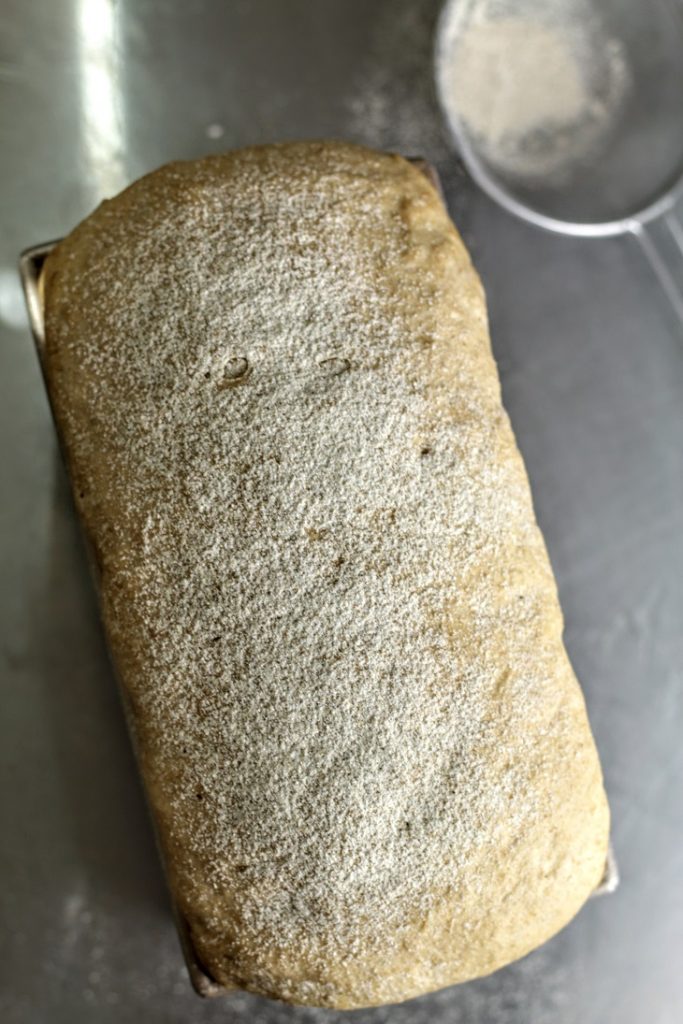
I like to dust the top with some rye flour. you can leave it plain or sprinkle with rolled oats. Wet the surface first so the topping sticks.
Bake the bread at 350 °F/ 180 °C for about 40 - 50 minutes
As soon as the bread comes out, unmold and place on a wire rack to cool. Wait till it is completely cooled to slice.
Shop the Ingredients

Hearty Sourdough Rye Sandwich Loaf
Ingredients
Method
- 1
Make the roux. Mix flour and water and cook whisking on medium heat until it thickens ( for about 5-8 minutes). Once done let this cool completely
- 2
Mix about 100 g water, starter, oil and molasses in a bowl and give a quick mix
- 3
Weigh the flour and salt in the bowl of a stand mixer, add the roux to the same
- 4
Start mixing and add the liquid gradually. Mix on low speed. Add the remaining 50g of water while mixing until dough is well hydrated. Use the extra 30 g of extra water only if necessary
- 5
Add a little flour if mixture is too wet. It should be a soft sticky mix but not runny or extremely wet
- 6
Once all the flour is hydrated, leave the dough to rest for about 15-30 minutes. Cover the bowl with a tea towel or a lid
- 7
Once rested, mix on medium for about 2-3 minutes scraping the sides as you go
- 8
Dough will become stronger and will start to release from the sides of the bowl. Add a little flour around the edges to encourage this
- 9
Once the dough is stable bring it on to a floured surface and slap and fold to finish off the kneading. use water to lubricate hands
- 10
After a few folds, the dough will be smoother and stronger (check the images above to understand the dough consistency)
- 11
Form a tight ball and place in a container, cover and leave in a warm place to bulk (3-4 hours at roughly 75-80F) Check the images to see what you are looking to achieve. Should be doubled in size
- 12
At the end of the bulk, tip the dough back on to a floured surface and punch down excess air, form into a tight dough ball
- 13
Place the dough ball in a air-tight container and let it rest for 30 minutes. If you wan to retard, you can place this in the fridge and finish baking the following day
- 14
Place the dough on a lightly floured surface, and roll out to a rectangular shape. Use the bread pan (mold) length as a guide to maintain the width of the dough. check pictures above to get an idea
- 15
The dough thickness should be close to 1/2 inch or less
- 16
Once done, start to roll the dough starting from one end as shown in the picture, just like you would roll a jam/cinnamon roll
- 17
Maintain the width, always keep the bread pan close as a guide (check pictures above)
- 18
Apply pressure while rolling and do not leave any gaps
- 19
Once done, pinch the end
- 20
Grease the tin lightly. Place the dough seem-side down in the bread tin and press gently to fit
- 21
It should be snuggled in the bottom part of the tin
- 22
Cover the pan (place inside a plastic bag) and place in a warm place until the dough is risen above the rim. This may take 3.5 to 4 hours depending on the temperature
- 23
Towards the end of the proof, preheat the oven to 350 F (180 C)
- 24
You can dust the top of the proofed loaf with some rye flour/rolled oats or leave it plain
- 25
Once preheated, place the bread in the oven
- 26
Bake for 40 minutes and check (internal temperature close to 200 F) or give it another 5-10 minutes if necessary
- 27
Once baked, remove the pan from the oven and set aside for 2 minutes before turning the bread out
- 28
The bread should slide off easily when the pan is tilted
- 29
If it is stuck, use a spatula to help release the bread
- 30
Leave the bread on a wire rack to cool completely before slicing
Never Miss a Recipe
Get new recipes straight to your inbox.



Comments
Loading comments…