Baked cheese tarts (Hokkaido style)

Have you ever had a Hokkaido bake cheese tart? If yes, then you know how good they are. I am addicted to these and they were quite popular back in Melbourne. You can find an outlet in most big shopping malls. But here in the states, they only sell these in Westfield San Francisco Center and Westfield Century City. I may be a fan, but I'm not going to board a flight just to eat a tart. So I decided to recreate it in my (test)kitchen.
First up, if you have a BakeCheesetart retail outlet nearby, by all means go get some and save all the trouble. Honestly, the original tart that you buy from their chain is the best.
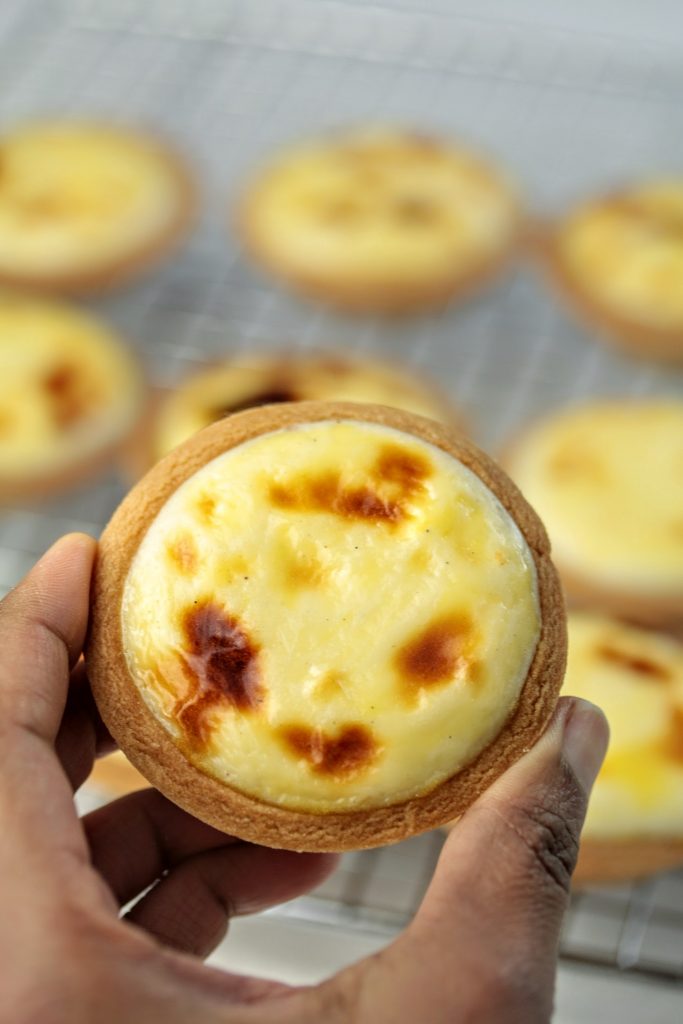
If you are like me, ready to go the extra mile, then this is for you. I found this recipe to be one of the hardest to recreate. It's been almost 3 years since I've had one, which made it even harder to remember the tiny details. However, after 4 batches and lot of cheese eating (and extra cardio) I decided to settle with this recipe.
In one sentence, these are shortbread shells, filled with cheese custard, that are then egg washed and baked for 5-6 minutes in a hot oven to finish off.
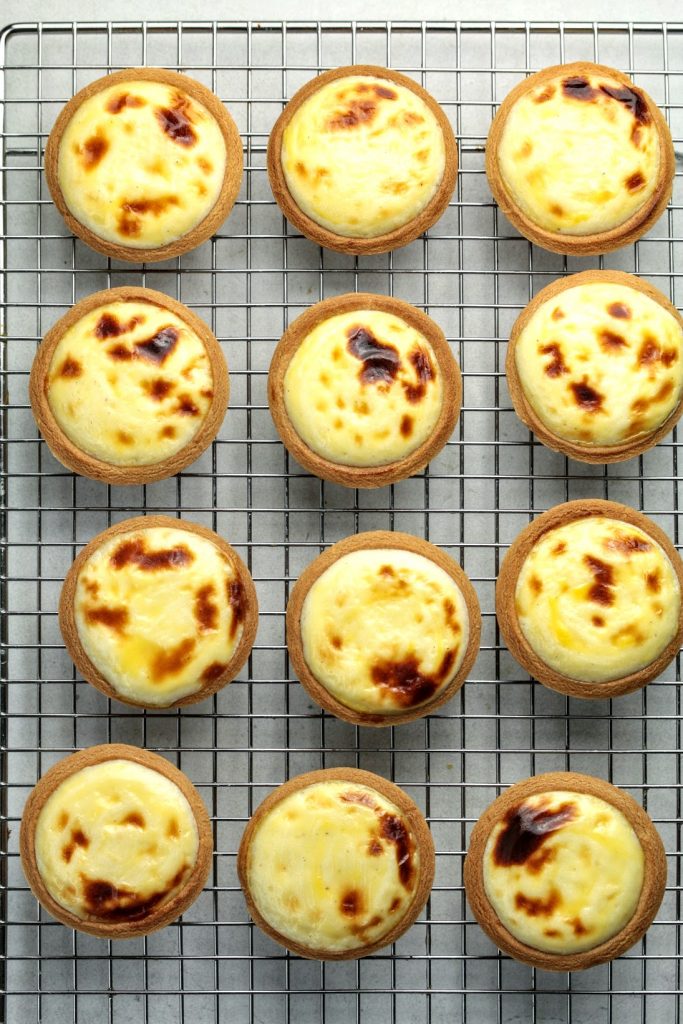
Following were my challenges and what I did to overcome them. If you are thinking about substituting, it's worth while to read the next section.
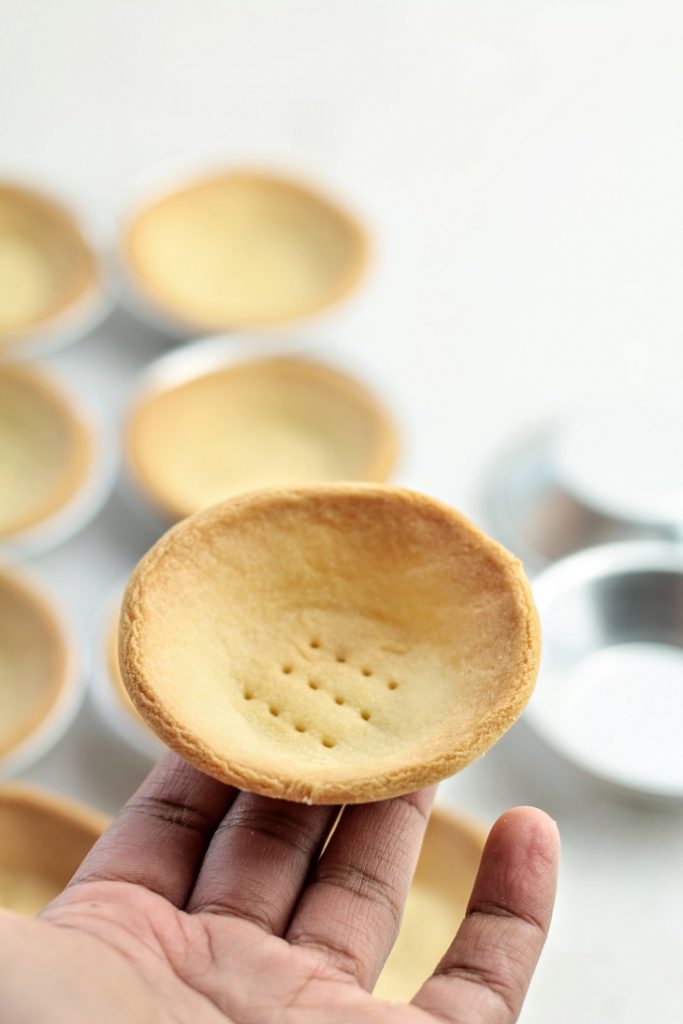
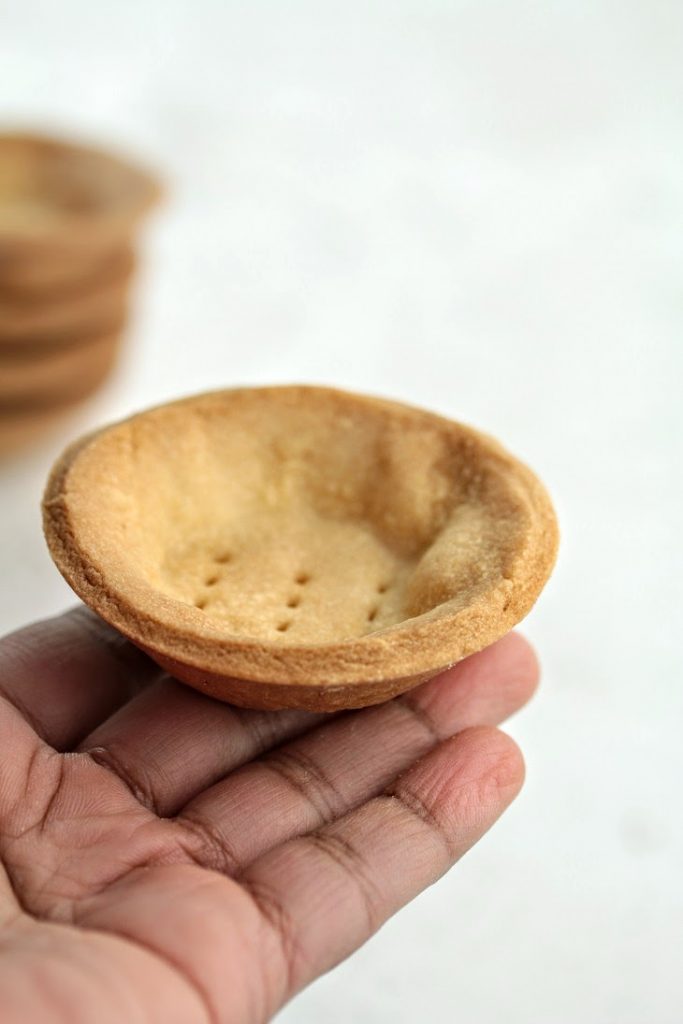
Tart shell: I'm using the same tart shells I used for my lemon tarts. The recipe is from Haniela's and this is the best tart shell recipe I have found so far. The only difference this time is that I rolled the dough much thicker. Because the tarts I remember had a thick crumbly shell. A thicker shell helps prevent the custard from being over-cooked too.
Cheese type:
First I thought I could make the custard by only using cream cheese. Mmmm...technically you can, but as soon as I tasted it, I thought it wasn't cheesy enough. It was just sweet and bland almost like cheesecake. I remember the actual tarts having a much more complex, pungent flavor. So yes, like many recipes I decided to use a collection of different, more potent cheeses to make the flavor interesting. I ended up using:
cream cheese, parmesan, mascarpone. I also added a tiny bit of sharp cheddar because I like that flavor, but it may not be for everyone.
To add a bit of tang, I used a little yogurt too.
Making the custard:
Okay so making the custard is simple. You have to melt, cheeses, butter, yogurt, powdered sugar, milk in a double boiler (bain-marie) until everything melts. Then add the cornflour(corn starch) and the egg white. Then you just have to stand there stirring for about 10 minutes, until the custard thickens. You can always taste the custard at this stage and adjust flavor (add salt/sugar or cheddar etc.)
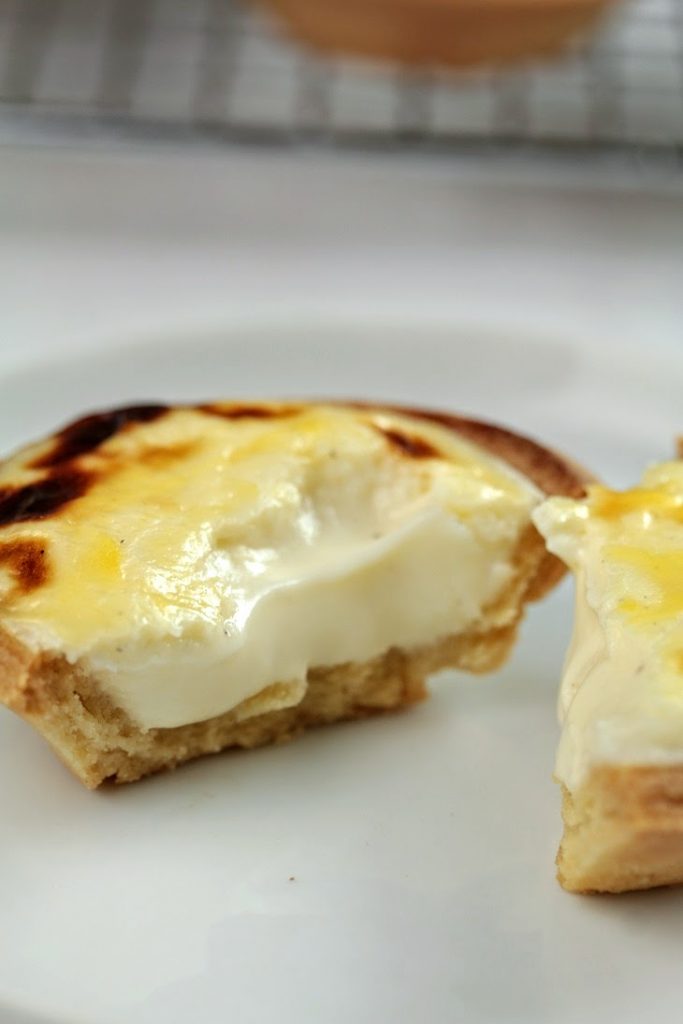
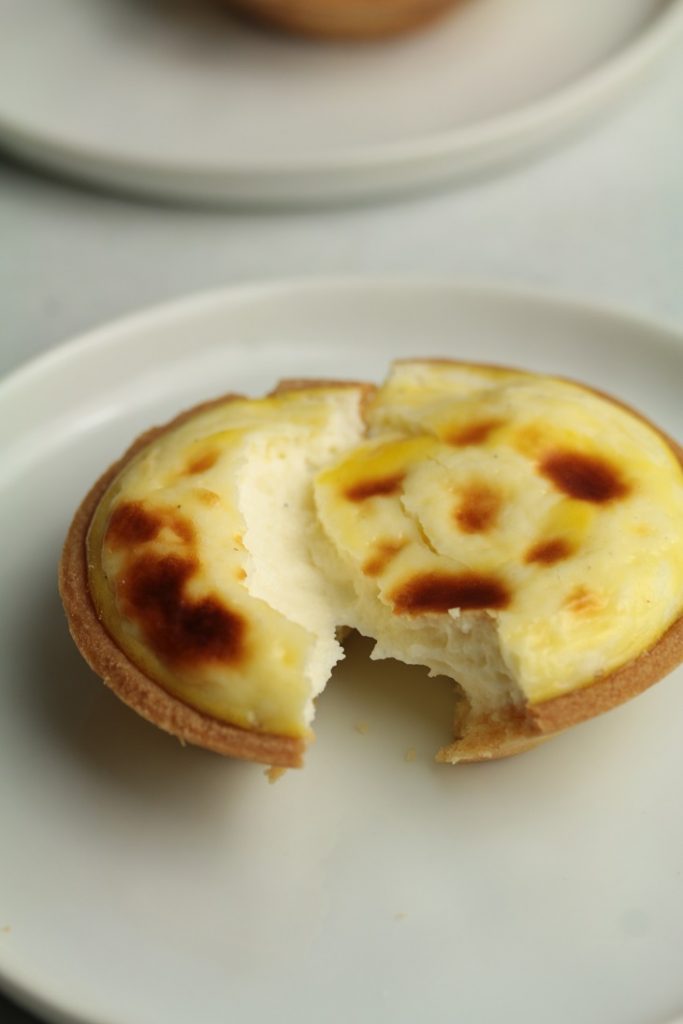
It is very important to cook the custard to the correct consistency. I found out that under cooking (thin custard) would result in too runny center and over cooking (too thick custard) will result in set filling almost like cheesecake. The perfect is to have a gooey(oozy) center.
So as soon as your custard starts to thicken, reduce the heat (of the boiling water) and cook it just until you start to feel the resistance to the whisk.
A nice trick is, to drop some custard (about a teaspoon) on to a cold plate, let it cool (for about 30 seconds) and check the consistency. If it is still runny, cook the custard a bit longer. If it has set semi-firm like set yogurt, then your custard is done.
Using a double boiler is the safest option. You could use a heavy base saucepan to speed up this process, but there is a higher risk of cheese catching the bottom and/or cooking the egg. To prevent that from happening, you will have to stir vigorously and efficiently nonstop. So I thought cooking on a bain-marie is both safe and relaxing.
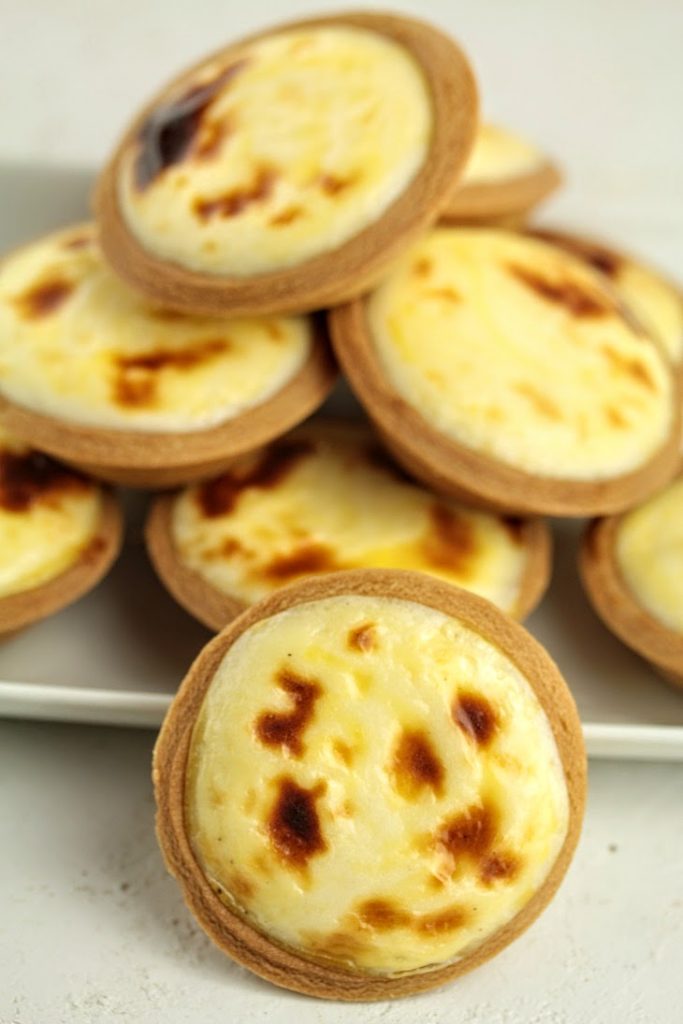
Chilling the custard helps easy piping. Also holds it's dome shape which is unique to these tarts, but not necessary. But more importantly, cold custard has less chance of being over cooked in the oven.
Baking or broiling:
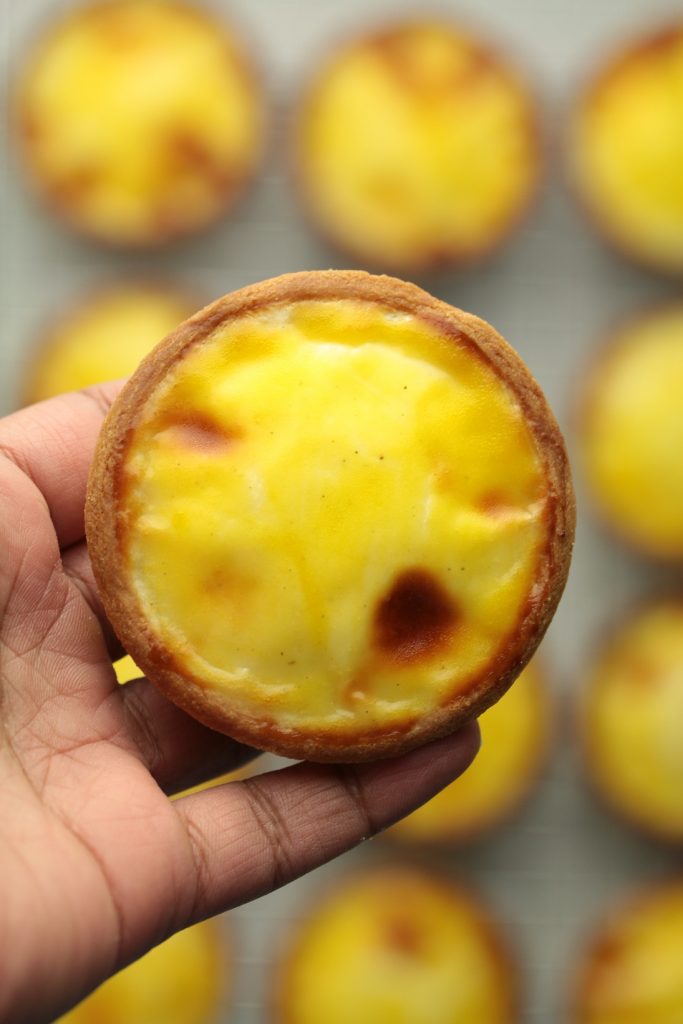
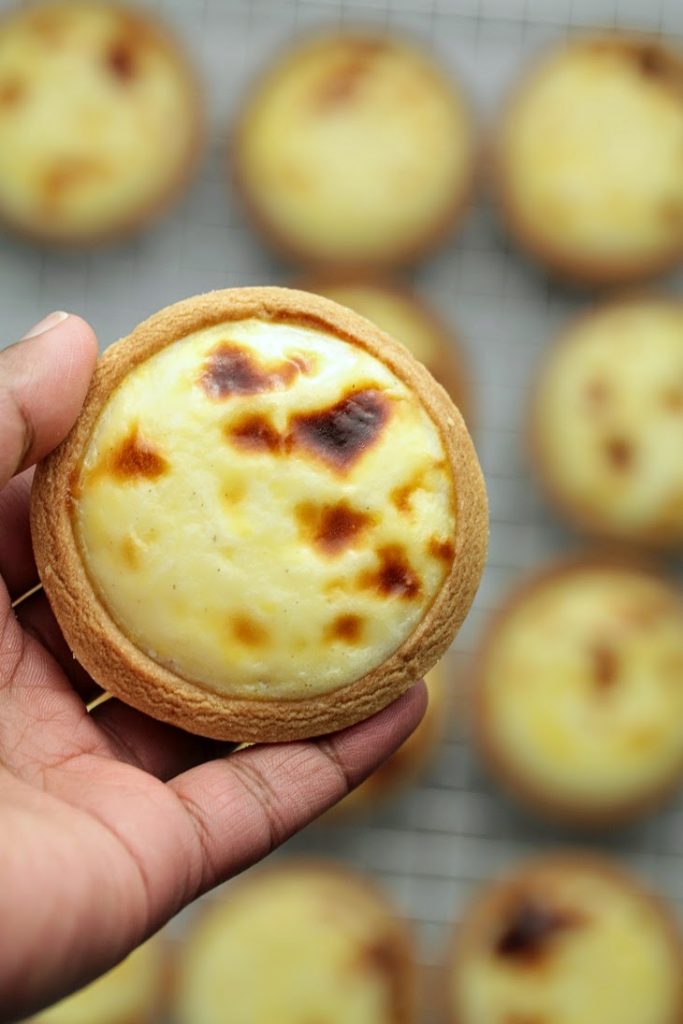
So the custard is cooked, the tart shell is cooked and what baking is really trying to achieve here is creating the golden top. The custard will cook a little too but not all the way. The options are either to bake in a very hot oven or to use the broil function to just cook the tops.
Baking: If you have a very hot oven (heat it to 500F) then place a rack in the top part of the oven and cook the tarts for 5-6 minutes or until the tops are golden brown evenly. Keep an eye. They can burn easily. And if you keep them for any longer, the cheese custard might fully set like a cheesecake.
Broiling: I went with broiling finally. Because my oven is not hot enough, and the heat is not evenly distributed. Also preheating the oven to a high temperature for just 5 minutes seemed like a waste to me. So I place these under the grill for 5-6 minutes. I kept watching them the whole time and pulled out the once that seem to be fully browned.
Egg wash:
I used just egg yolk the first time and found that it sets like a rubber skin on top and it takes longer to brown. So I decided to thin it down with a bit of milk. Also added some sugar to remove the egg smell and taste. Sugar helps browning too (caramelizing)
Cool the baked tarts:
If you try to eat a tart as soon as it comes out of the oven or while still warm, you'll find that the custard is still runny. For the best gooey consistency, chill the tarts in the refrigerator for at least an hour before serving.
Storing:
Store in an air-tight container in the refrigerator for several days. I haven't tried freezing them yet.
Other flavors:
You will find other flavors at the shop, like blueberry and chocolate. Feel free to experiment. To introduce flavor, simply spread a thin layer of berry jam(bluebrry/strawberry) or lemon curd at the bottom of the tart before filling it with cheese custard. For the chocolate flavor you can place some chocolate chips at the base of the shell or add cocoa powder/cooking chocolate to the custard itself while cooking.
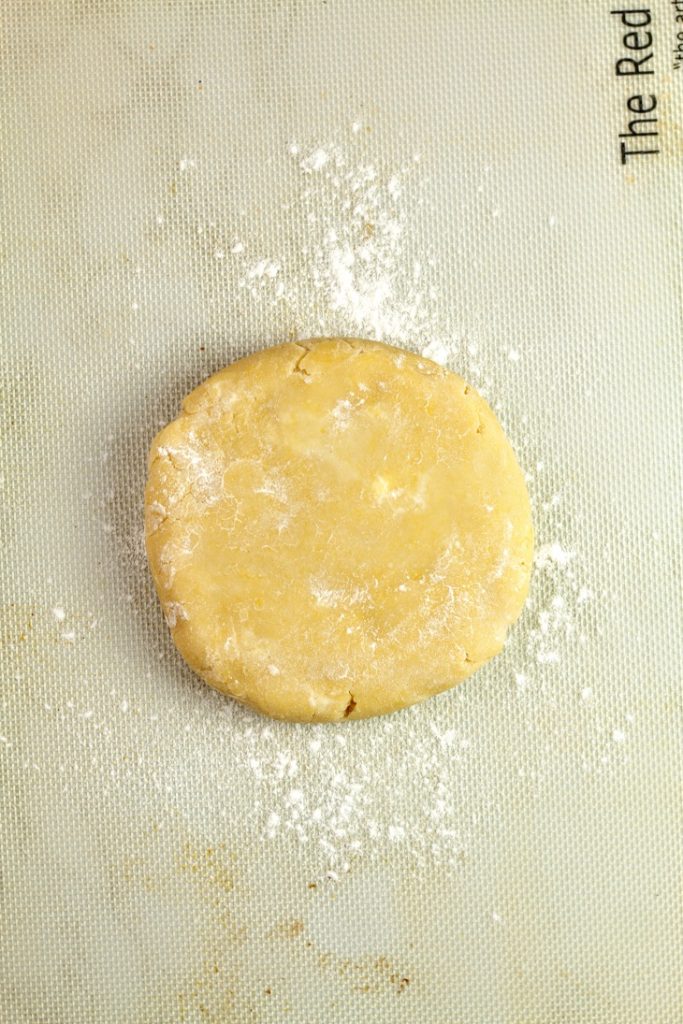
Make the shortbread dough and chill it for at least 30 minutes. Bring the chilled dough to room temperature (pliable) and roll out to about 4-5 mm thickness
These will fit into half sheet pans
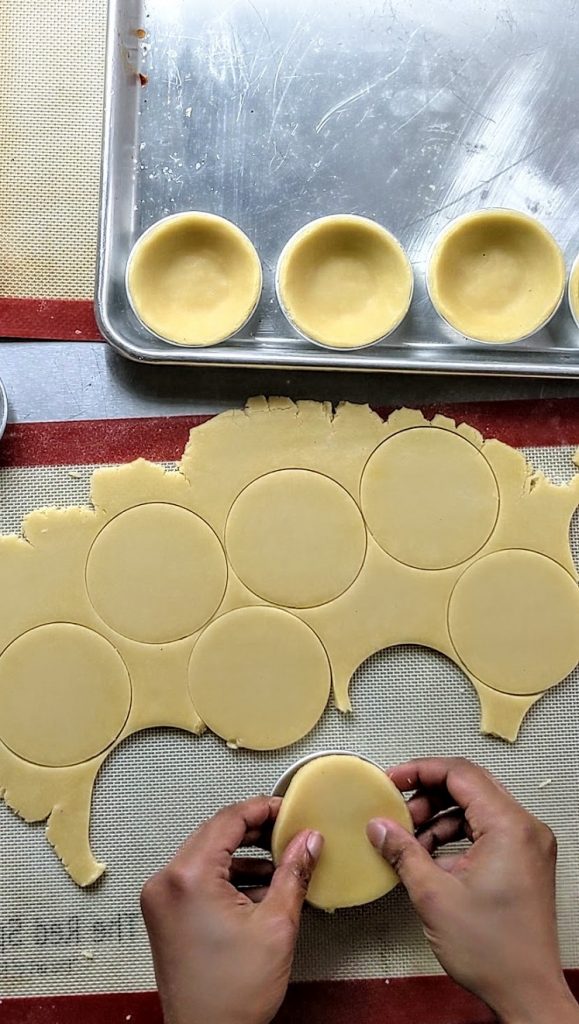
Cut out circles and place in the tart molds
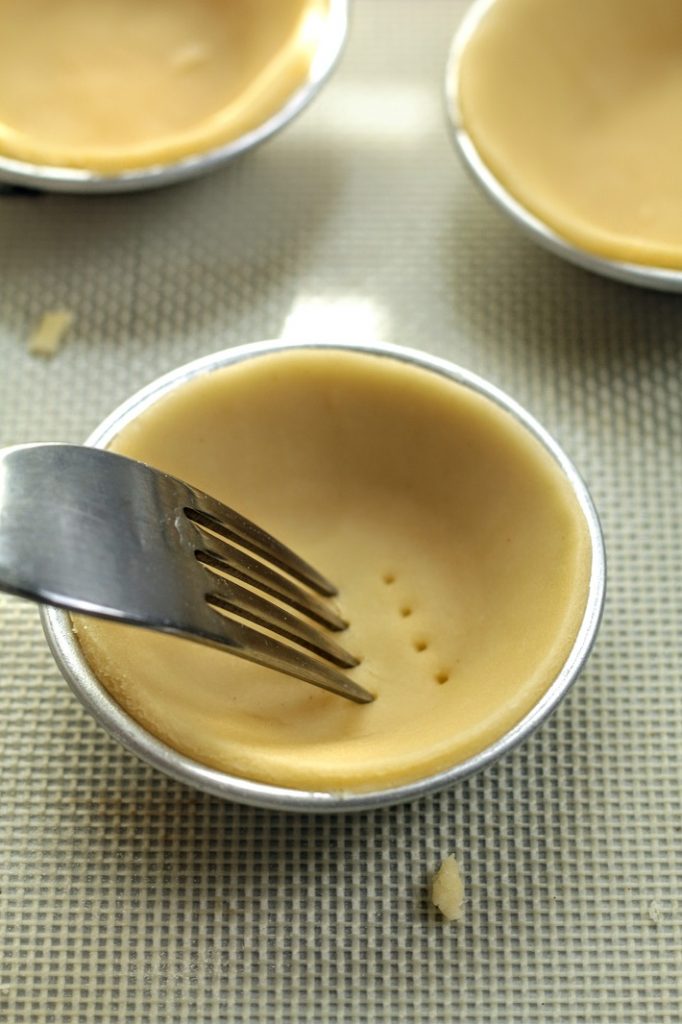
Dock the bottom and bake in a 180°C oven for about 20 minutes
Once baked remove from the oven and leave to cool completely
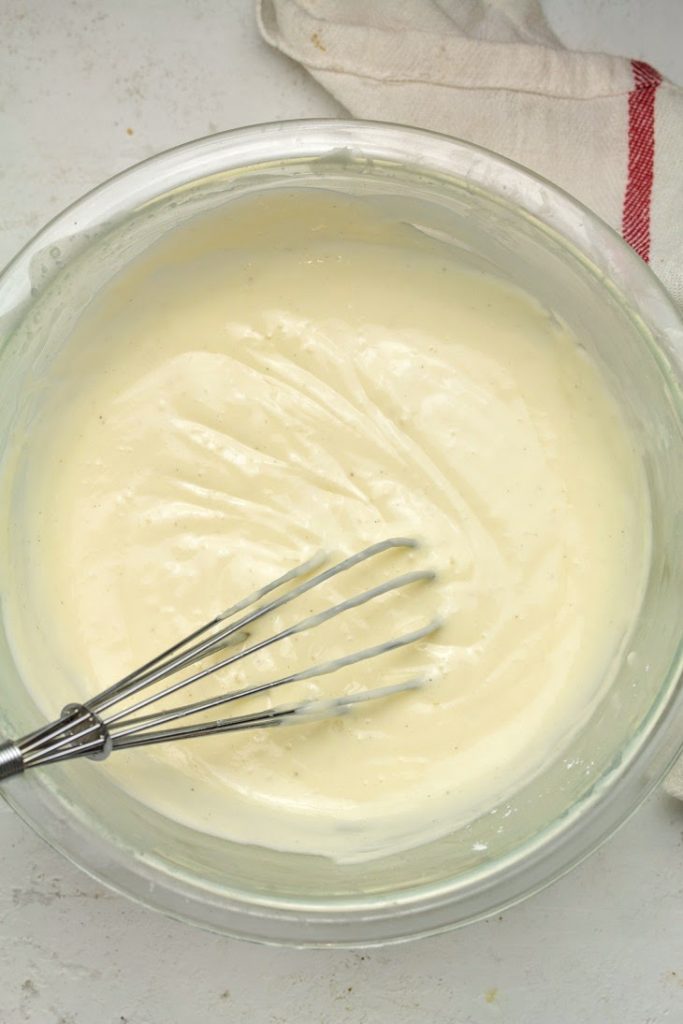
Cook the cheese custard to the right consistency. A semi-set custard will give the perfect gooey center. Overcooked custard will result in a set cheese tart.
Read the post above for further instructions.
Chill the custard before using
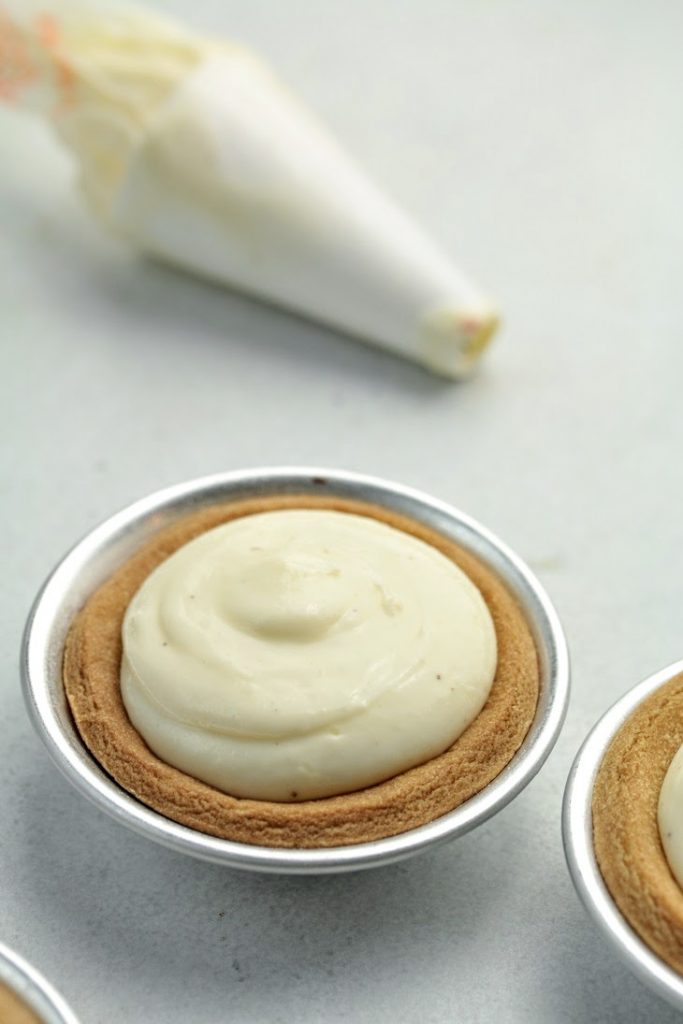
Fill a piping bag(fitted with a round tip) with the custard and pipe a dome shaped blob in the tart shell.
Placing the shells in the mold will help handling.
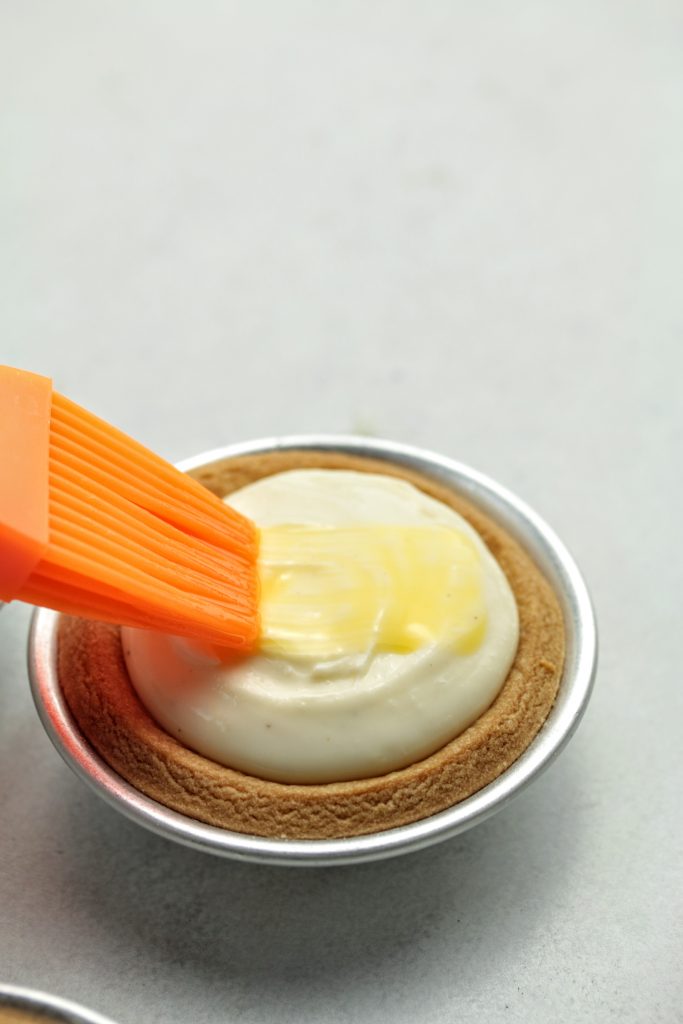
Apply a thin layer off egg wash on the piped cheese custard.
Place these under a broiler (or very hot oven) and bake/cook until the top is golden brown
Once done, place on a wire rack to cool. For the gooey center, chill the tarts for about an hour before serving
Shop the Ingredients


Baked cheese tarts (Hokkaido style)
Ingredients
Method
To make the short bread shells
- 1
In a stand mixer, combine the butter, icing sugar until it becomes a paste
- 2
Add the egg yolk and mix to clear
- 3
Add the sifted flour and mix on medium speed
- 4
Add vanilla and if the mixture doesn't come together add 1 tbsp. of cold milk
- 5
Bring the crumbly mixture on to a floured surface and press into a smooth dough
- 6
Flatten, wrap in cling film/parchment and place in the fridge for at least 30 minutes. (2 hours or more is recommended)
- 7
Once the dough has relaxed(chilled) pull it out and leave outside to soften up
- 8
When the dough is pliable, roll out on a floured surface to about 4-5mm thickness
- 9
Cut out circles and place in the tart mold
- 10
Press to create shape and dock the bottom using a fork
- 11
Arrange these on a tray and chill for about 10 minutes
- 12
Bake in a 180°C (350°F) oven for about 20 minutes or until light golden brown
- 13
leave the shells to fully cool down before using
To make the custard
- 14
Prepare a double boiler (glass bowl placed on top of a saucepan with consistent boiling water)the bottom of the bowl should not touch the water
- 15
Place everything except, corn starch, egg white and vanilla in the bowl
- 16
Stir and cook until everything melts into a smooth mixture
- 17
Add the corn starch and egg white and cook stirring for about 8-10 minutes or until the custard is thick enough. Read the post above for further explanation
- 18
Once the custard is cooked, take off the heat(double boiler) and add the vanilla
- 19
Strain the mixture if you see lumps
- 20
Place the custard, in a bowl, cover and let cool slightly
- 21
Then place in the fridge to chill completely
To make the tart
- 22
Place the cooked tart shells back in the mold
- 23
Fill a piping bag with the chilled custard
- 24
Pipe a domed blob of custard in the tart shell
- 25
If custard is soft, place the shells in the fridge before egg washing
- 26
Prepare the egg wash by mixing yolk, milk and sugar
- 27
Apply a thin coating of egg wash on the piped custard
- 28
Place the tarts on a tray and place under the hot broiler/grill for 5-6 minutes or until the tops are golden brown
Notes
You can use a very hot oven to bake/cook the filled tarts. In that case, preheat the oven to 500°F before filling the shells. Place a rack in the top 2/3 section of the oven and bake the filled tarts for 5-6 minutes or until the tops are golden brown
Never Miss a Recipe
Get new recipes straight to your inbox.
You might also like


Comments
Loading comments…